How to do a hanging indent on Google Docs?
Written by: Hrishikesh Pardeshi, Founder at Flexiple, buildd & Remote Tools.
Last updated: Sep 03, 2024
TABLE OF CONTENTS
- What is a hanging indent?
- Why use a hanging indent in Google Docs?
- How to do a hanging indent in Google Docs?
Hanging indents are mostly used for academic writing, research papers, or a list article. They are also a requirement for certain styles like MLA and APA. Regardless of whether you are in the academic field or are just looking to make your text easier to read, you would need to learn how to create a hanging indent. So, in this article, we explain how to do a hanging indent on Google Docs and the benefits of using it.
What is a hanging indent?
A hanging indent is when every line in a paragraph is indented, except for the first line, which begins at the margin. This way, the first line stands out from the others, making it easier for others to read.
A hanging indent is also known as a negative indent or second-line indent. Here is an example of a hanging indent on Google Docs.

As you can see above, the second line and the subsequent lines are indented 0.5 units to the right when compared to the line above it.
This text formatting style is commonly used for bibliographies, reference pages, and works cited pages. Hanging indents are also a requirement for styles such as CMS (Chicago Manual of Style), MLA (Modern Language Association), and APA (American Psychological Association).
Why use a hanging indent in Google Docs?
One of the most common reasons for using a hanging indent is that it makes it easier for a person to read the content.
In addition, the hanging indentation provides extra space to your margins. This is particularly helpful if you intend to take notes and jot down other points after taking a physical copy of the document.
You also save time when using a hanging indent. Since you don't have to use the Tab or Spacebar key to align the document, you can save a lot of time. While the tab button does work, it is more vulnerable to human error and misalignment, forcing you to repeat the process again.
A hanging indent provides ample space while creating a list. It ensures that the document is well-formatted and has enough spacing to make the document look legible.
How to do a hanging indent on Google Docs?
There are two ways to create a hanging indent in Google Docs: The first one is by using the ruler tool and the second is by using the menu option.
Ruler Tool Method
- Open Google Docs
- Highlight the text you want to indent.
- From the ruler at the left margin, drag the ‘Left Indent' marker (▼) to about half-inch to your right
- Drag the ‘First Line Indent' marker (▃) back to the left margin to create a hanging indent on your highlighted text
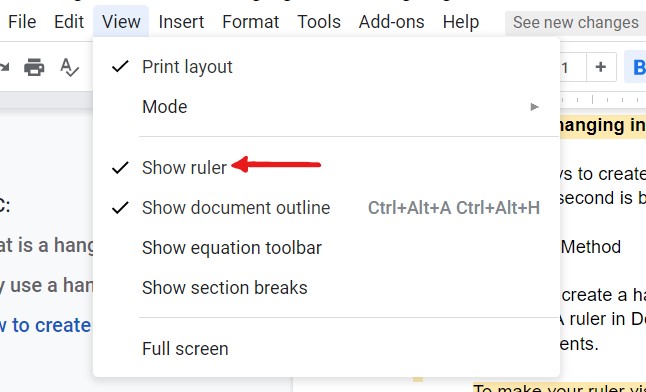
In order to create a hanging indent in Google Docs, you must first ensure that your ruler is visible. A ruler in Docs will help you in aligning elements in your document and for measurements.
- You can make your ruler visible by clicking on the 'View' option in your navigation bar and then checking the 'Show Ruler' field.
- Choose the text you want to indent. This can be a single paragraph or multiple paragraphs, or it can even be an entire article.
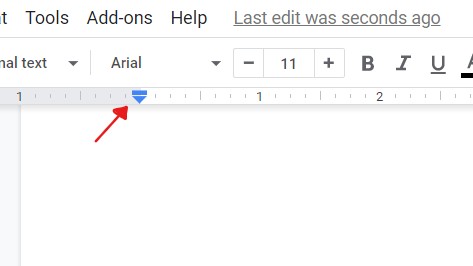
- Then, drag the left indent marker (the blue inverted triangle) to the right. You can drop the marker wherever you need the hanging indent to begin. A common indent is about a half-inch. As you do this, the rectangle follows along, and all the highlighted text gets indented.
- Now, drag the First Line Indent marker (blue rectangle) back to the left margin where it was present earlier.
- You'll now see a hanging indent on your highlighted text.
Now on the ruler at the left margin, you will be able to see a blue-colored rectangle atop a triangle. We will use both these items to create a hanging indent.
The light blue rectangle (▃) indicates the position of the First Line Indent.
The light blue triangle (▼) denotes the position of the Left Indent.


In order to add a hanging indent to the entire document, you need to highlight all the text and follow the steps above once. However, if you need the hanging indent in only certain sections or paragraphs, you will have to repeat the steps for each instance.
Menu Option Method
- Open Google Docs
- Highlight the text you want to indent.
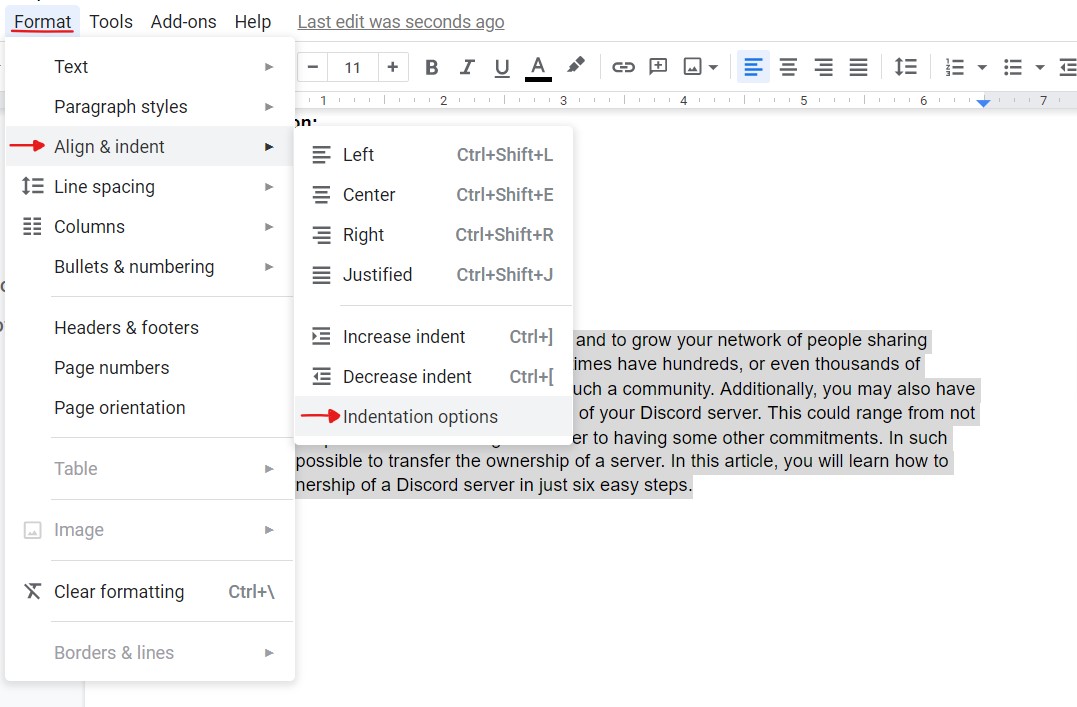
- Along the navigation bar, click on the ‘Format’ option. Next, click on ‘Align & Indent’ and finally select the ‘Indentation Options’.
- In the ‘Special Indent’ section, click the drop-down and then choose ‘Hanging’.
- Enter the amount of indentation and click on apply to get the hanging indent on Google Docs.
Firstly, go to the document on Google Docs and highlight the text where you want the hanging indent.

Next, go to the ‘Format’ menu on the left side of Google Docs. Then, click on the ‘Align & Indent’ option. Next, select the ‘Indentation Options’.
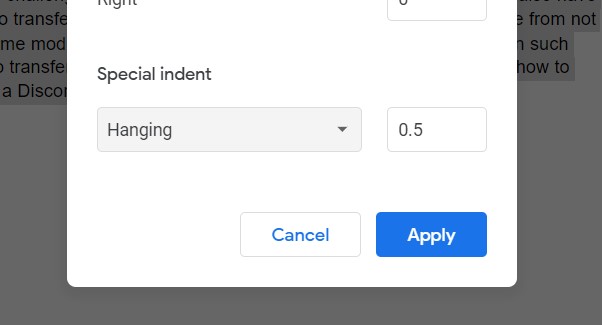
Now, from the ‘Special Indent’ section, click the drop-down and then choose ‘Hanging’.
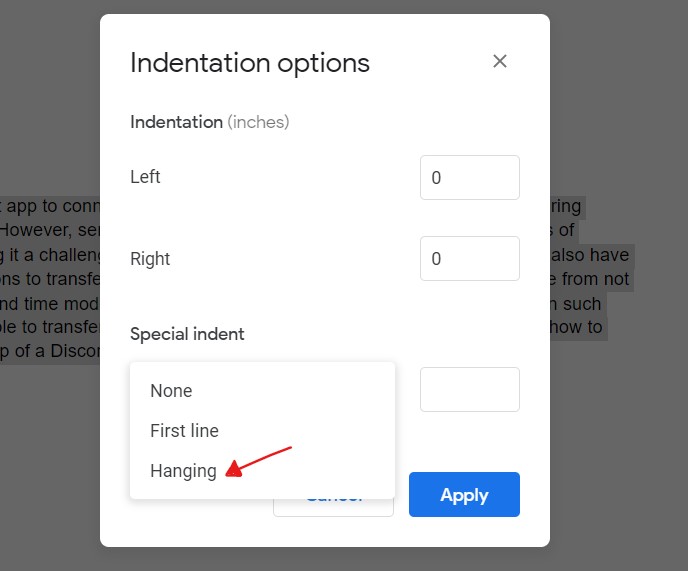
In the box, enter the amount of indentation (in inches) that you need for your paragraph. In the final step, select apply to get the hanging indent with your preferred setting.
Related Articles
⇾ How to do hanging indent on Word
⇾ How to Alphabetize in Google Docs
Trending Articles
⇾ How to change to Landscape in Google Docs?
⇾ How to Make a Table of Contents in Google Docs
⇾ How to make Columns in Google Docs