How To Make Discord Stickers?
Written by: Hrishikesh Pardeshi, Founder at Flexiple, buildd & Remote Tools.
Last updated: Sep 03, 2024
If you are looking for a fun way to make your Discord chats more interesting, you can learn how to make stickers on Discord. Creating Discord custom stickers can help your mirror your personality during a conversation. Your sticker can be animated or static images. Here's everything you need to know about making a Discord sticker.
TLDR
Follow these steps to discover how you can make Discord stickers:
-
Create a Discord server.
-
Get a PNG file with a 320 x 320 resolution and a maximum file size of 500KB. You can use any photo editing software to resize the picture if it doesn't fit these requirements.
-
Go to your server and select the Server Settings tab.
-
From the server setting menu page, select Stickers.
-
Once you do this, you will see an Upload Sticker button to add the sticker you created. Note that you can't add stickers to your server using the Discord mobile app; you can only do this using the desktop or web app.
Table of Contents
- Step 1: Create a Discord Server
- Step 2: Create Your sticker
- Step 3: Upload Stickers to Your Server
- How to Use Stickers on Discord Desktop and Mobile Apps
- How to Give Users Access to Custom Stickers on Your Server
Step 1: Create a Discord Server
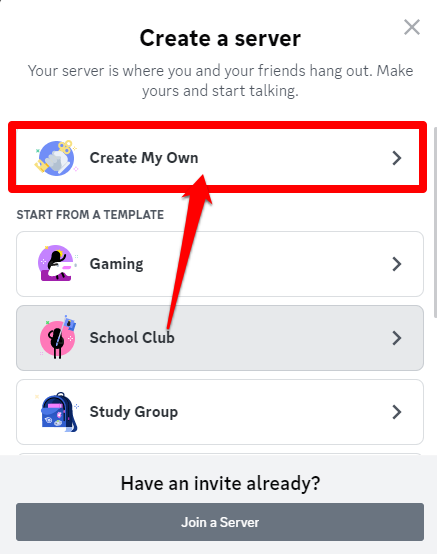
If you want to create and add custom stickers on Discord, you need to be a server owner or have permission from other users' servers. Log in to your Discord account and locate a round icon with a plus sign on the server menu which will be on the top left corner of your screen. Click on that sign to add a new server.

You will see a pop-up asking if you want to create or join a server. Click on Create My Own.
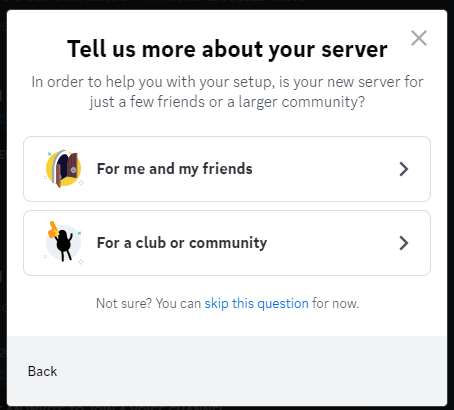
This takes you to a Tell us more about your server page. Here you can choose between the For me and my friends button or For a club or community button.
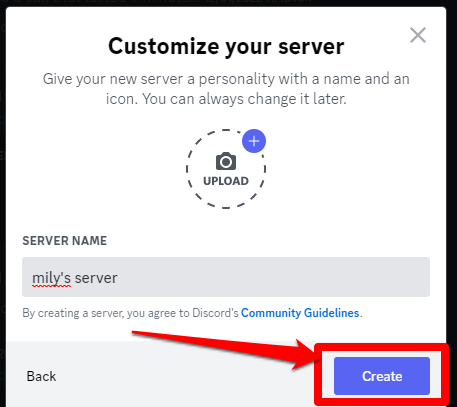
After this, you can type your server's name on the next page that pops up and upload an icon. Then, click on Create.
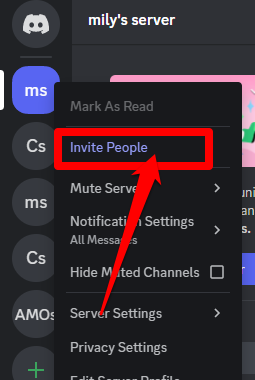
Once you have created your server, you can invite other Discord users to join the channel by right-clicking on the server's icon. Select the Invite People tab.
Step 2: Create Your sticker
Access to your chosen image is required to create stickers online or on your device. You can also create a blank canvas on any online editor app to design your picture. Make the edits you want, such as cropping, resizing, or rotating the image. You can add text with custom background colors, fonts, or styles and erase any part of the picture you don't need. Once you're done creating, save it to your files on your PC.
When creating a sticker, ensure it has the following conditions:
-
Static file types must be in PNG format
-
Animated file types should be in APNG format
-
Dimensions of the picture must be 320ps x 320px
-
The maximum acceptable file size is 512KB
Ensuring that your sticker follows these conditions will make it easier for you to upload them to your server.
Step 3: Upload Stickers to Your Server
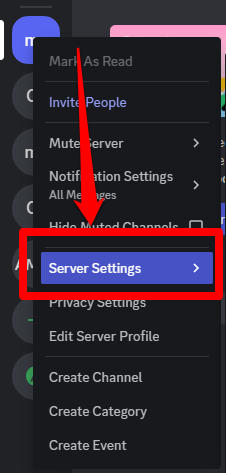
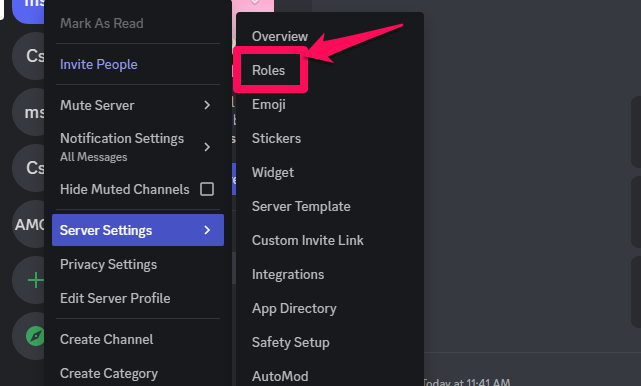
You can use stickers that you uploaded to your Discord server. Go to your server and right-click on the server name to get a menu. From the options on the menu, select Server Settings.
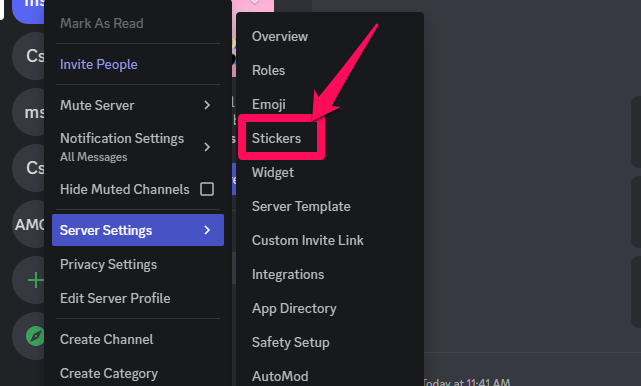
This will lead you to the Discord server settings menu. Locate Stickers which you can find on the dropdown menu.
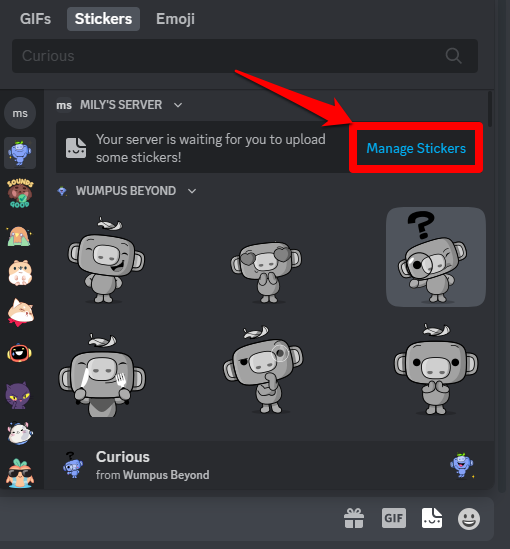
Note that you can also decide to click Stickers which is on the field where you type messages. This will display a tray that contains sticker options.

Once you get there, you can click on the Manage Stickers button. This will lead you to the same page as you would if you went through the server settings route.
Following the above steps leads you to a page with the Upload Sticker option. Click upload sticker to add stickers on Discord.
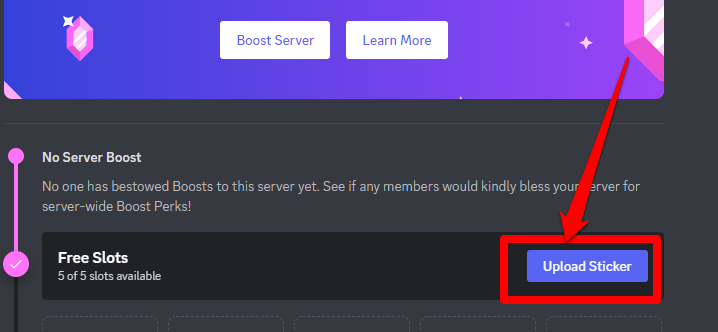
The number of slots to add more custom stickers to your Discord server depends on your boost level. Boosts are a way for users to pay to add new features to their servers. You can get your server boosted by paying a certain fee on Discord. Boosted servers can upload more stickers:
-
No server boost: 5 stickers
-
Level 1: 15 stickers
-
Level 2: 30 stickers
-
Level 3: 60 stickers
Note that if the server drops a level, you can lose access to the stickers occupying the extra slots. For example, if you drop down from level 2 to level 1, you can lose access to 15 stickers.
This will lead you to a page where you can add stickers to Discord, type the sticker name, and choose a related emoji. Choosing a related emoji can help your sticker appear as a suggestion to match Discord emojis when server members are searching for a specific sticker.
You can also include a description to help users with screen readers.
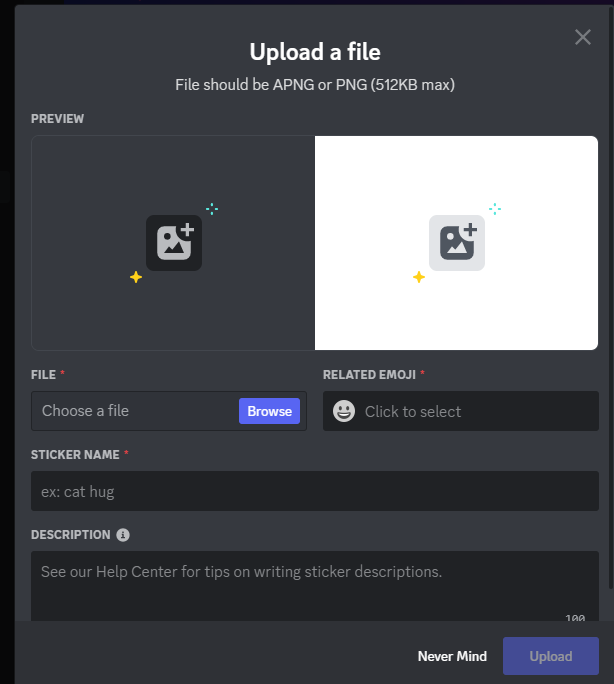
Once you are done with this, you can click on the upload button in the same section.

After uploading your own stickers, you can move your cursor over the picture if you want to make any changes. Click on the pencil icon to edit your custom stickers.
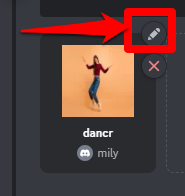
Note that you can only edit the custom stickers' information, not the stickers themselves. You can also remove stickers by clicking on the red cross sign that is below the pencil icon.
How to Use Stickers on Discord Desktop and Mobile Apps
You can use stickers on Discord regardless of if you're a free Discord user or a nitro user. Nitro users can use stickers created by Discord for users with a nitro subscription. They can also use stickers created on other servers. Users using Discord nitro can also use their Discord sticker in DMs.
Follow these steps to send stickers to channels:
-
Open Discord and locate the server to which you want to send the custom Discord stickers.
-
If you are using a desktop, click on the Sticker icon between the GIF and Emoji buttons on the messaging field. You will see your sticker options pop up. Click on your choice to start sending stickers to other server members.
-
If you are using the mobile app, click on the smiley face icon on the messaging field and select Stickers.

How to Give Users Access to Custom Stickers on Your Server
If you are a server owner and want to allow the members to create their own Discord stickers, you can follow these steps:
Step 1: Go to the Server Settings
In the server settings dropdown menu, click on Roles.
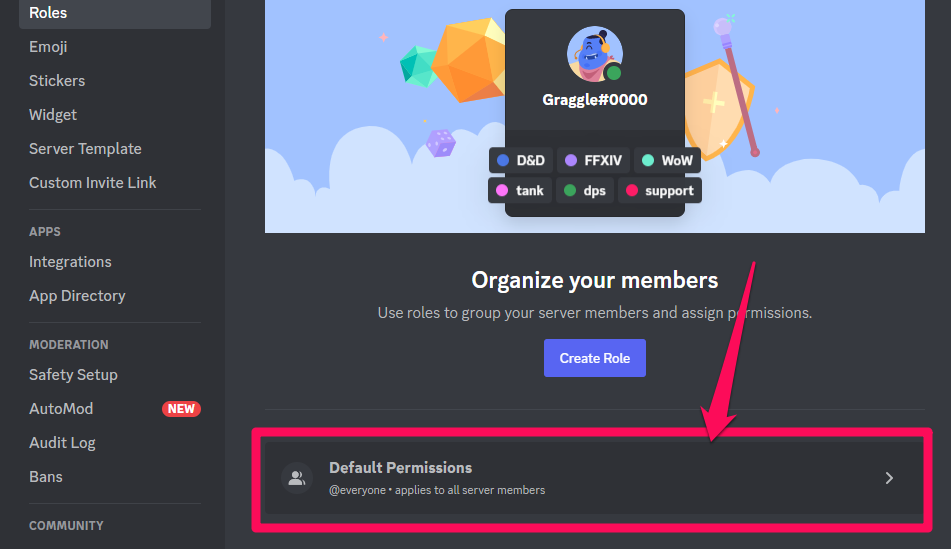
Click on Default Permissions on the next page that appears.
Step 2: Locate the Permission Tab
Under the Permission tab, scroll down till you locate the Manage Emojis and Stickers on the General Server Permission tab. This tab can allow members to add or remove an external emoji or sticker in the channel.

Click on the slider to enable this feature, and click on the Save Changes option.