How to Make a Channel Read Only on Discord
Written by: Hrishikesh Pardeshi, Founder at Flexiple, buildd & Remote Tools.
Last updated: Sep 03, 2024
If you own a Discord server with a fairly large community, creating read-only channels is a user management technique you can employ to ensure important messages do not get drowned in-between conversations. The Discord read-only channels are text channels within a server containing settings restricting users from sending messages. Such read-only channels can only be accessed by the server owner or some members with special text channel permissions to send messages or create public threads visible to all the members.
Many a time, server owners set the server rules and announcement channels to be read-only Discord channels. Depending on your choice, you can create a new read-only channel or convert an existing channel to read-only by updating the channel's settings. If you are looking for how to make a channel read-only, read on as this tutorial takes you through the steps of creating a read-only channel. You will also learn to update select server settings and channel permissions to convert a specific channel to read-only.
TLDR
The steps below will help you make a text channel read-only on Discord:
-
Log in to the select server hosting your intended read-only channel.
-
On your text channels list, select the Discord channel you want to turn into a read-only channel.
-
Click on Edit Channel.
-
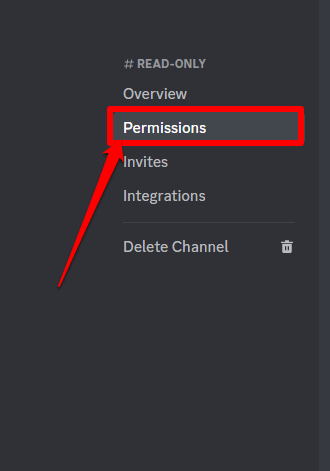
Select Permissions in the window that appears next.
-
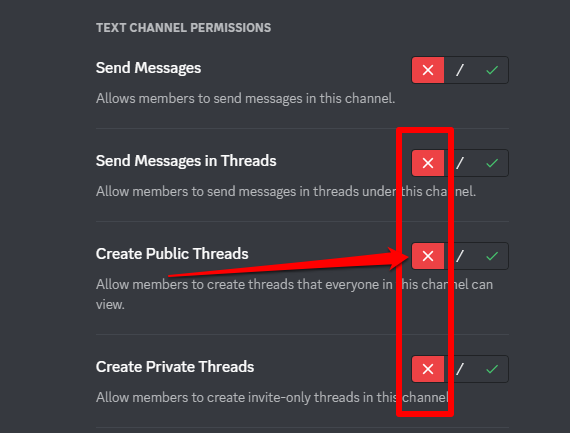
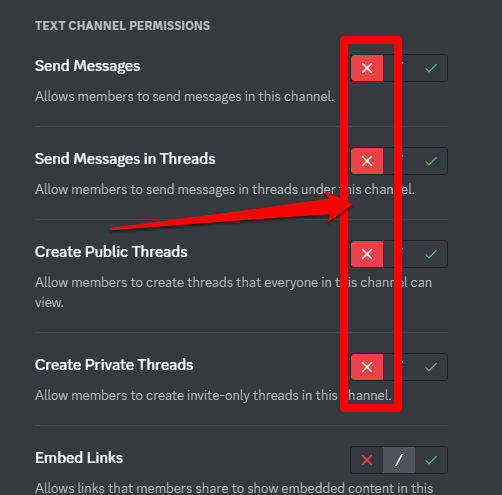
In the advanced permissions section, click on the red x beside the Send Messages, Send Messages in Threads, Create Public Threads, and Create Private Threads to disable these permissions.
-
Click on Save Changes once you're done and you have successfully created a read-only channel on Discord.
Table of Contents
How to Create a Read-Only Discord Channel
Follow the steps below to create a new read-only channel in Discord:
Step 1: Log in to Your Discord Account
Log in to your account using the Discord app or web interface. If you don't have the app downloaded on your device you can access the web version here.

Step 2: Select the Server of Your Choice
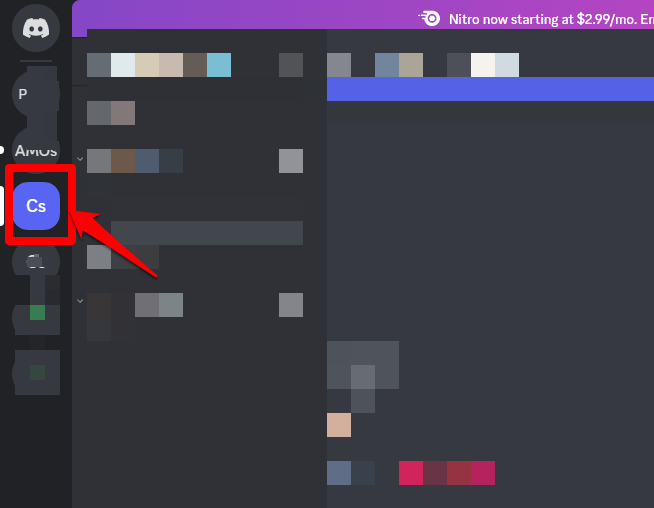
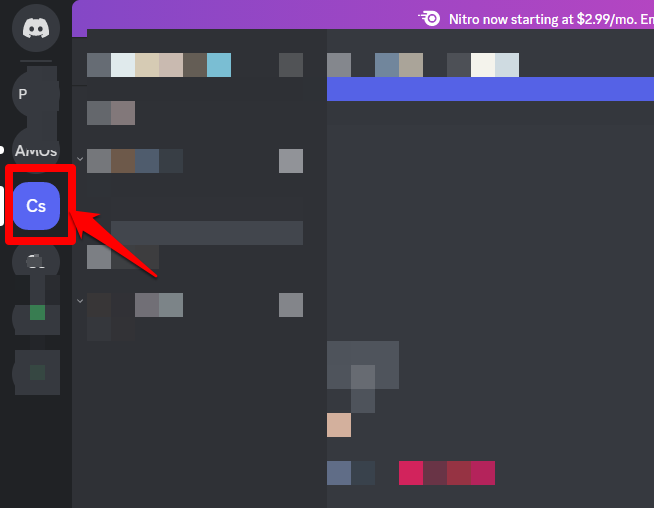
Select the server icon from the list of servers on the left sidebar to choose a Discord server that will host the channel you want to create.
Step 3: Click on Create Channel
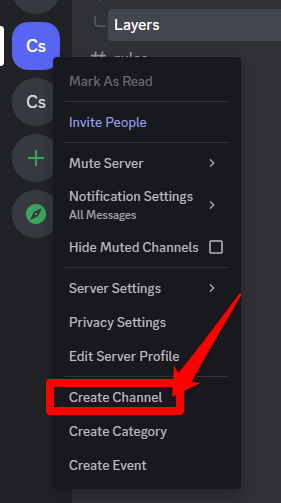
Go to the server settings but right-click on the gear icon at the bottom of the screen. Select Create Channel to start a new channel from the drop-down window that appears.
At this point, a window will appear on your screen with various options to customize your new channel. When choosing the channel type, select Text to enable users to send messages in texts, images, and emojis. Input the channel name in the appropriate fields.
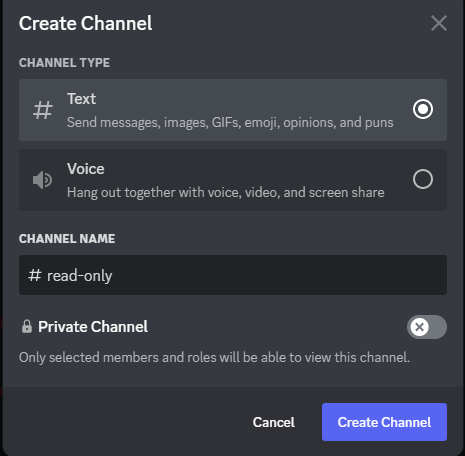
Unmark the Private channel button to ensure that server members can view the channel. Enabling the Private Channel settings allows only selected members and admins to view the channel.

Click Create Channel.
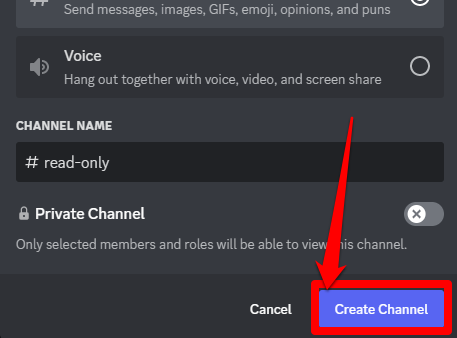
Note that the new channel you are to create should be a text channel.
Step 4: Go to the Channel’s Settings
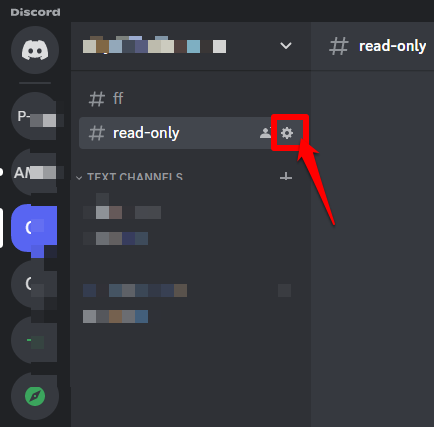
After creating the new channel, click on the Edit Channel icon which is a gear icon located beside the #new channel name.
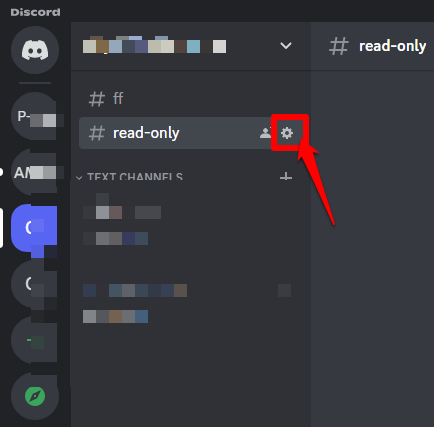
Clicking on this icon will lead you to the channel's settings page.
Step 5: Select Permissions
On the channel's settings page, click on the Permissions tab.
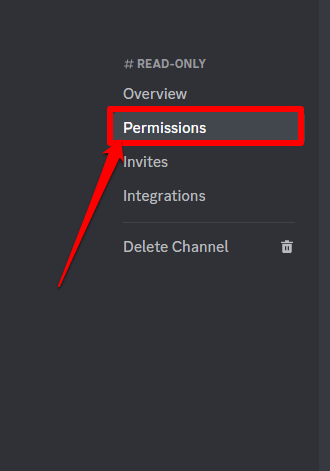
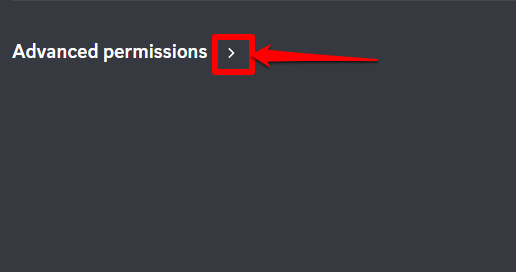
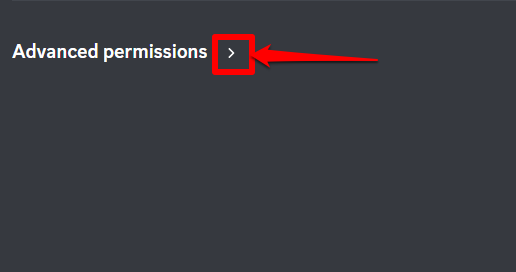
Click on the arrow next to the Advanced Permissions header to gain access to the advanced permissions available to you.
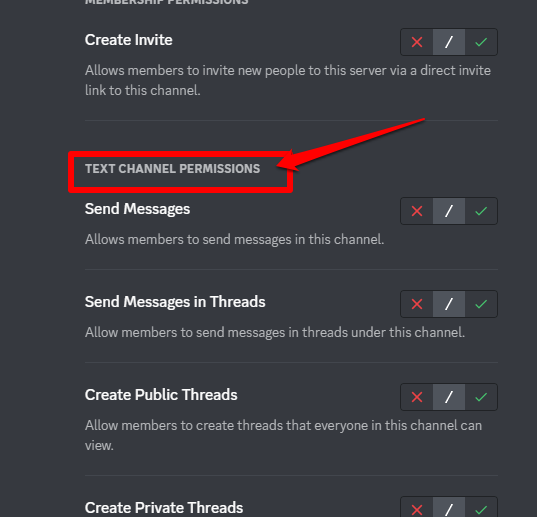
Scroll down until you see the Text Channel Permissions header.
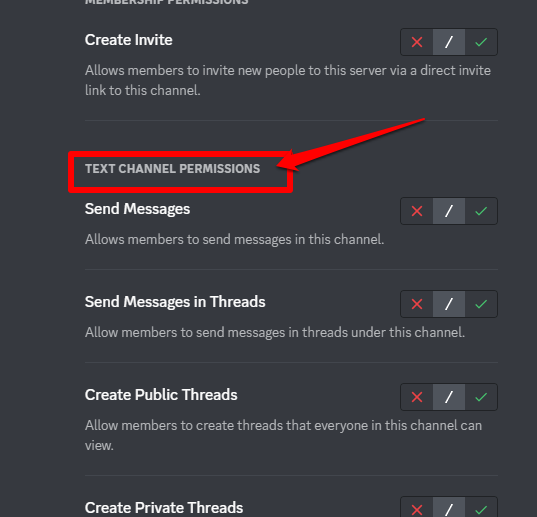
In this section, click on the red cross beside the Send Messages to disable this permission.

Repeat this same process for the Send Messages in Threads, Create Public Threads, and Create Private Threads to disable these permissions.
Click on Save Changes once you are done disabling these permissions.

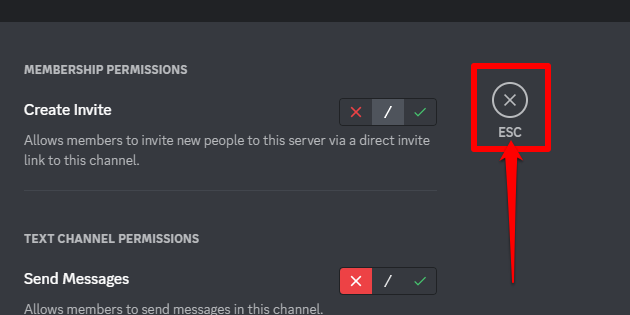
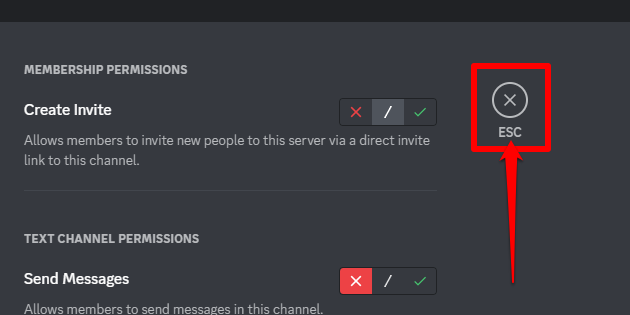
Exit this setting page once you are done by clicking on the ESC icon at the top of your screen and you have successfully created a read-only channel.
How To Turn an Existing Channel Into a Read-only Channel on Discord
Follow these steps to make a Discord channel read-only:
Step 1: Click on the Edit Channel Icon
Go to the server that contains the channel you want to turn.
Click on the Edit Channel tab which is a gear icon located next to the right of the channel you intend to manage.
Step 2: Select the Permissions Tab
On the page that appears next, select Permissions.
Go to the Advanced Permissions section by clicking on the arrow beside a header with this same name.
Scroll down that page until you locate the Text Channel Permissions header.
Click on the red cross next to the Send Messages, Send Messages in Threads, Create Private Threads, and Create Public Threads to disable these permissions.
Click on Save Changes once you're done with this setup.

Click on the ESC button to leave the settings page.
You have successfully converted your existing Discord text channel into a read-only channel.