How to Code a Discord Bot: A step-by-step Guide
Written by: Hrishikesh Pardeshi, Founder at Flexiple, buildd & Remote Tools.
Last updated: Sep 03, 2024
If you have been using the Discord app for a while now, there are several reasons you should know how to code Discord bots. One of the great things about Discord bots is that you can use this software to automate many of the tasks you would otherwise have to do manually, such as moderating chat rooms, monitoring new users, and managing your own servers.
This text tutorial will show you to build and program your Discord bot with or without a solid programming background.
TLDR
The following steps will show you how to program a free Discord bot from scratch.
- Create a Discord server
- Create a Discord app and connect the bot to your server.
- Download the Python programming language installation package.
- Program the bot using Python.
Table of Contents
Step 1: Create Your Server
Before creating your own Discord bots, you must have a server where you want to connect the bot. The steps below will guide you to create a server on Discord.
- Open your browser and go to the Discord website to log in to your account.
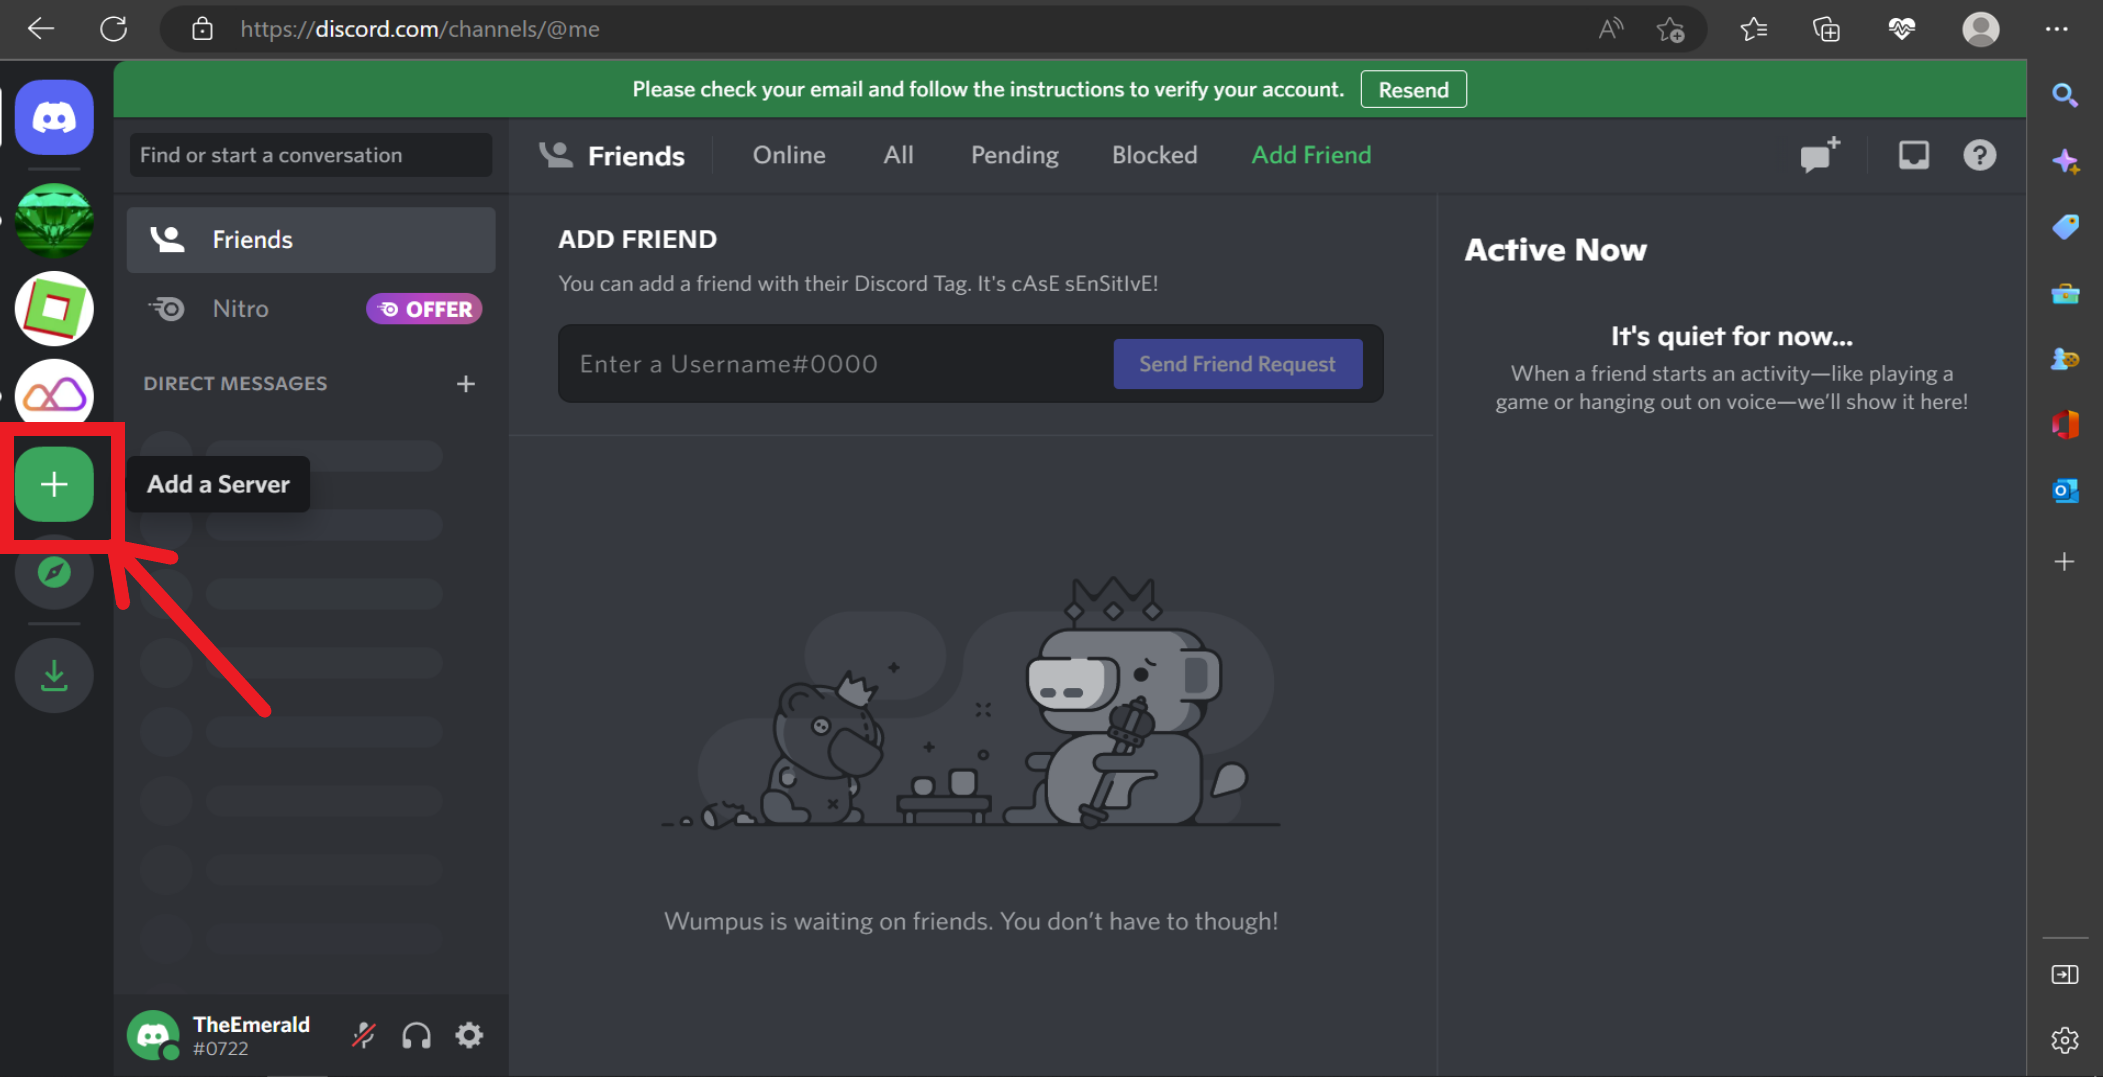
- Click on the plus button on the side panel on the left side of your screen
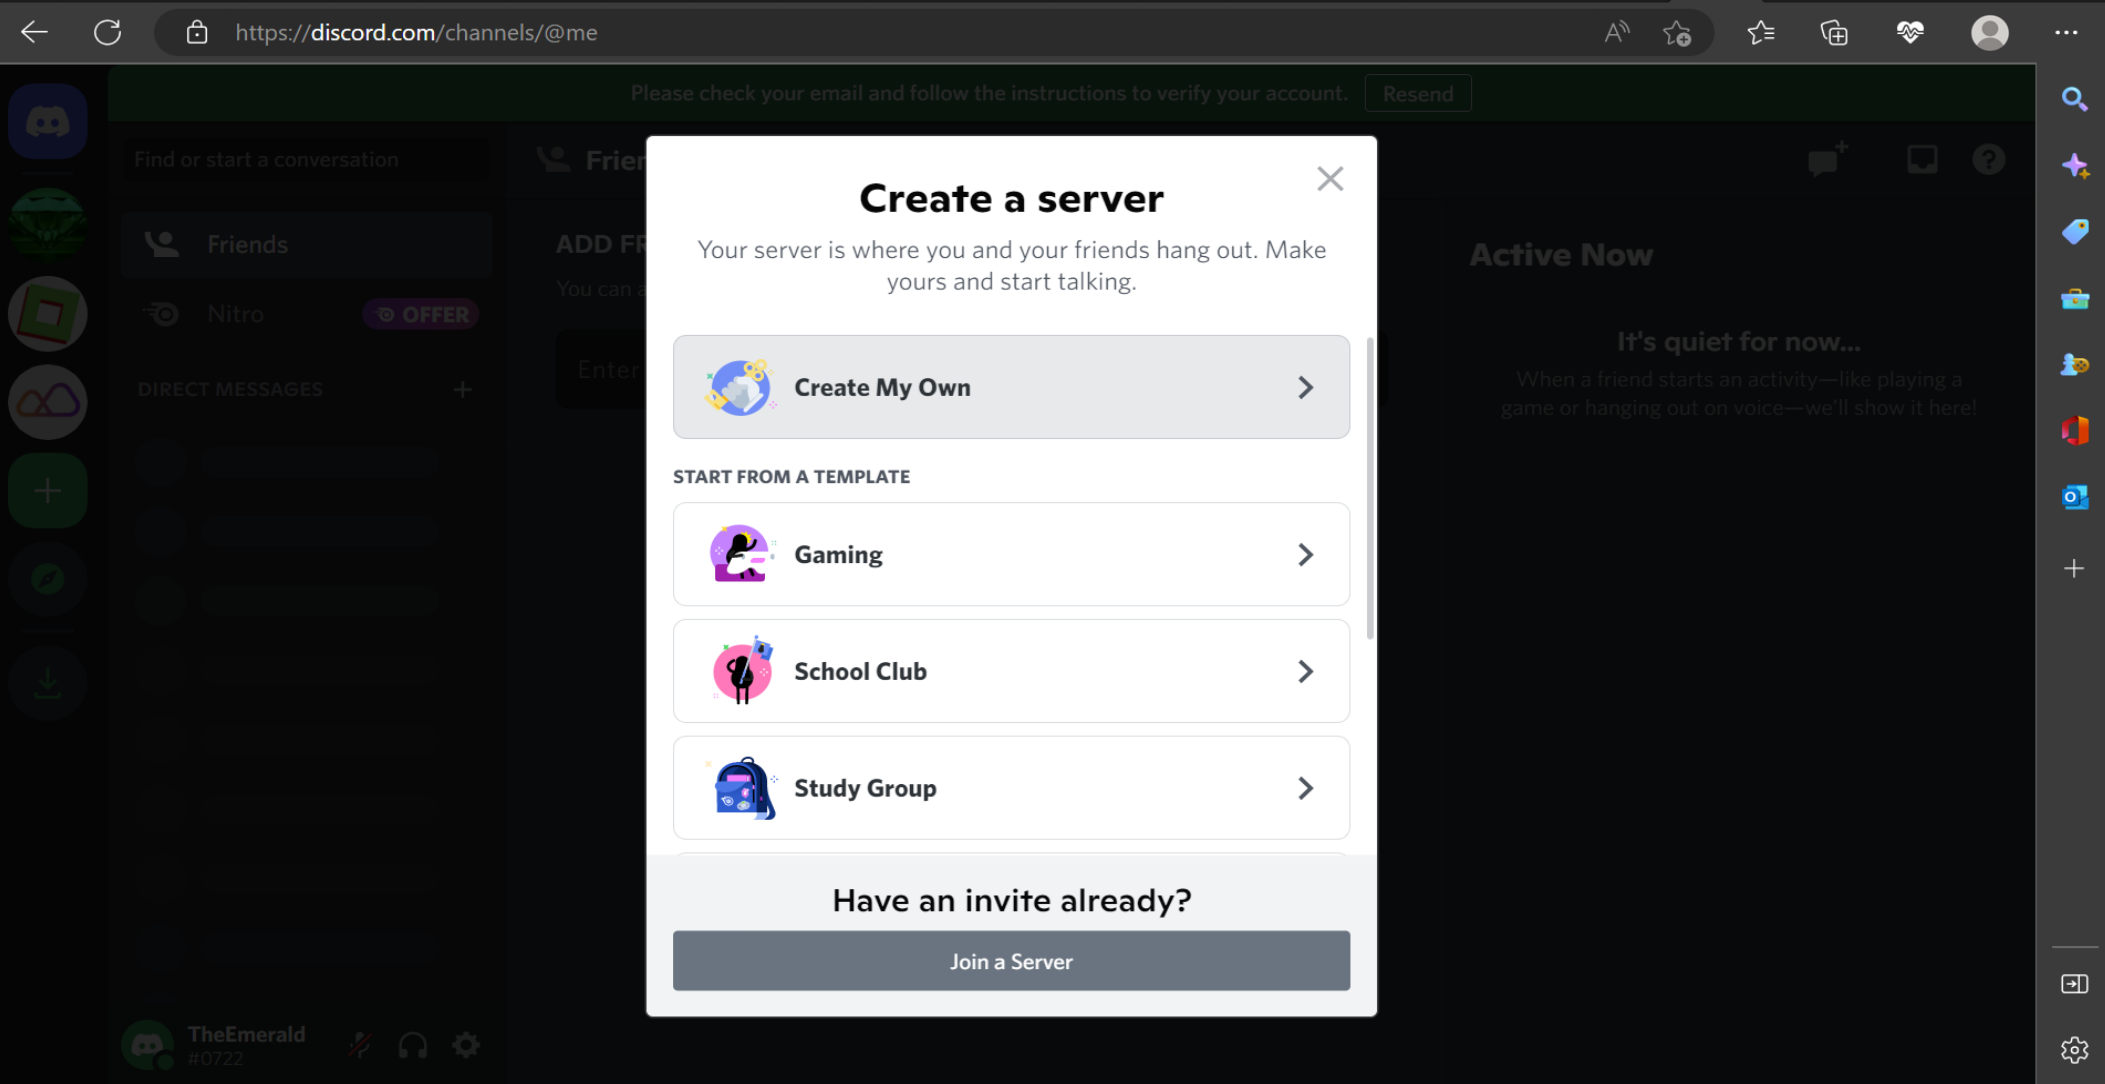
- At this point, a new window will appear with a list of options. Click on “Create My Own.”
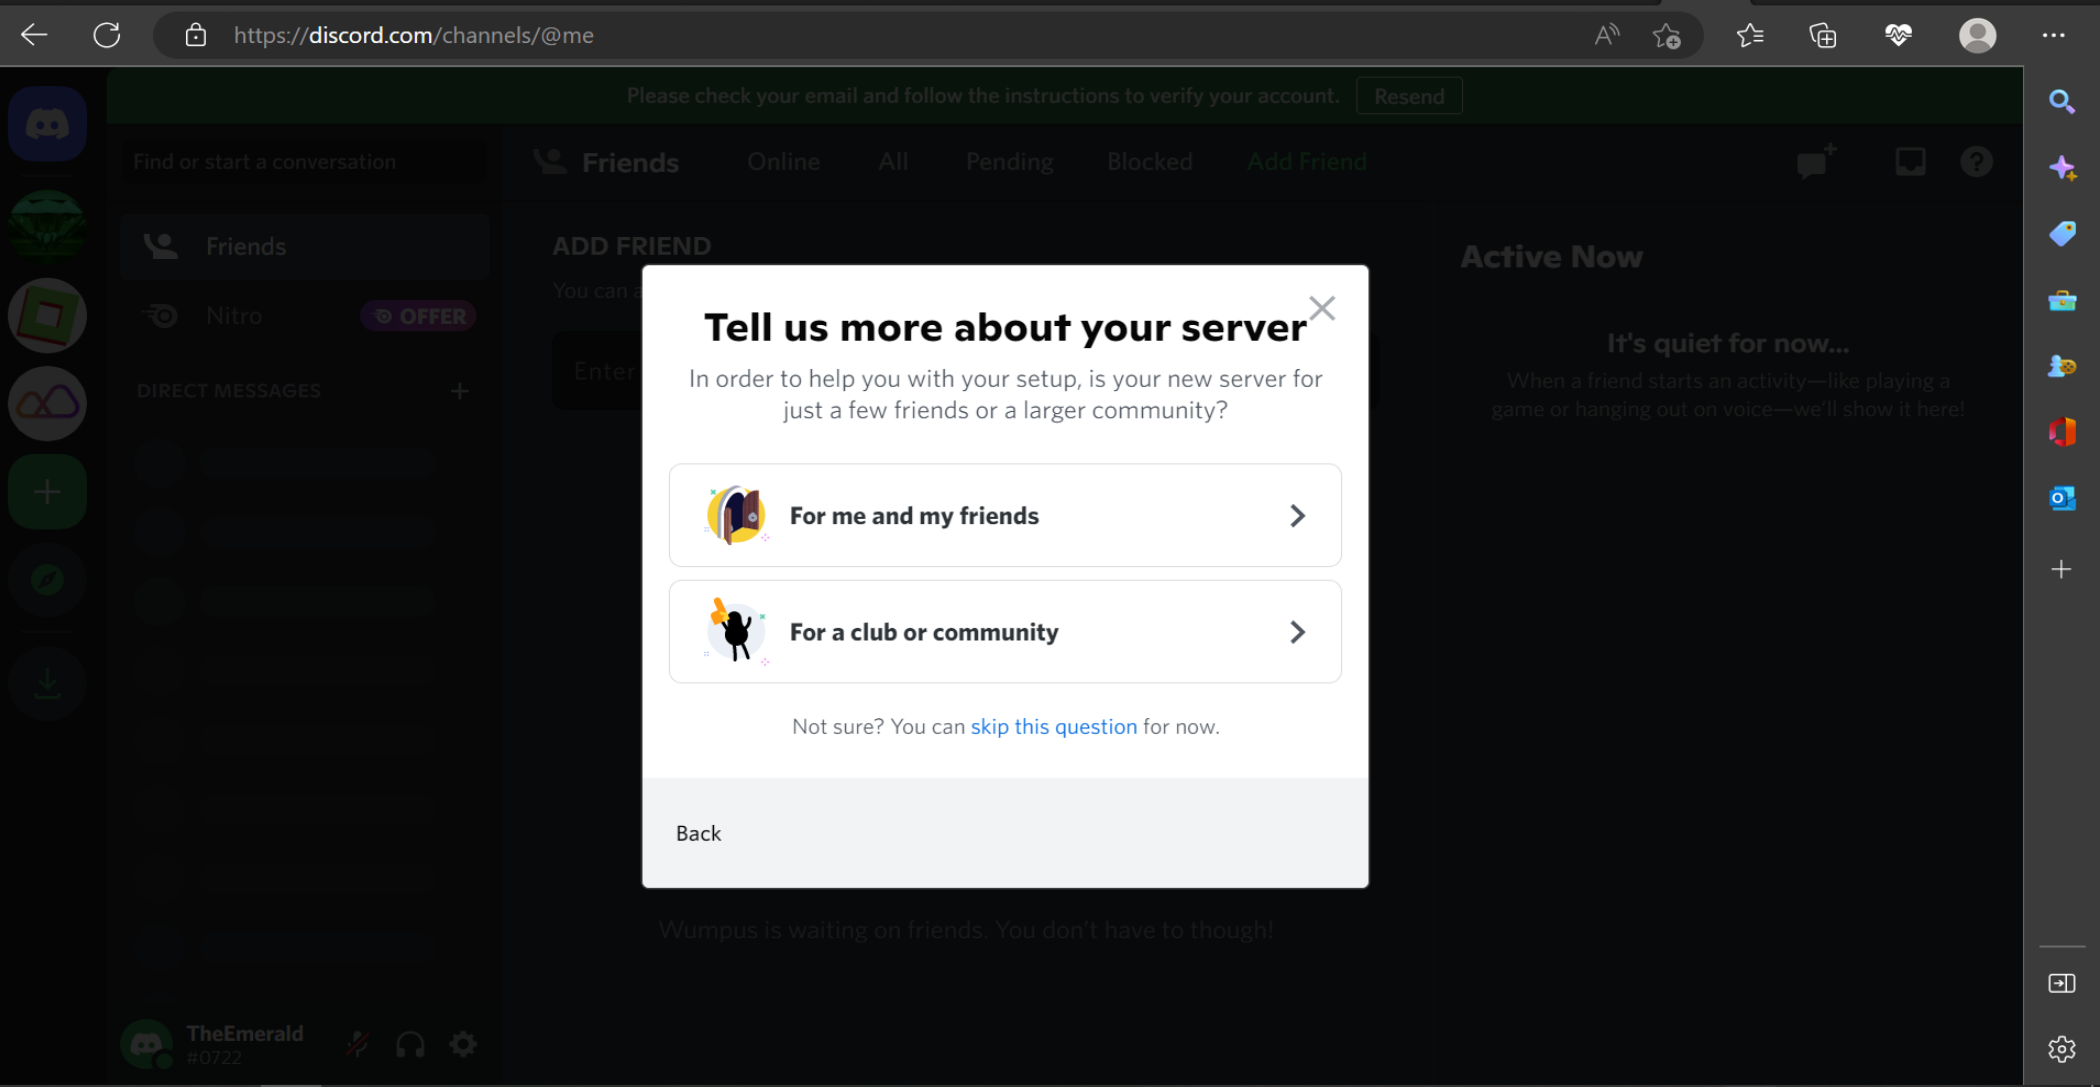
- Depending on the number of server members hoping to host, you can choose either of the two choices that Discord provides on your new window. If you are creating the server for a few people, you can select “For me and my friends.” Others hoping to host a larger community can select the “For a club or community option.”
- Next, input your server name into the description box provided and click Create.
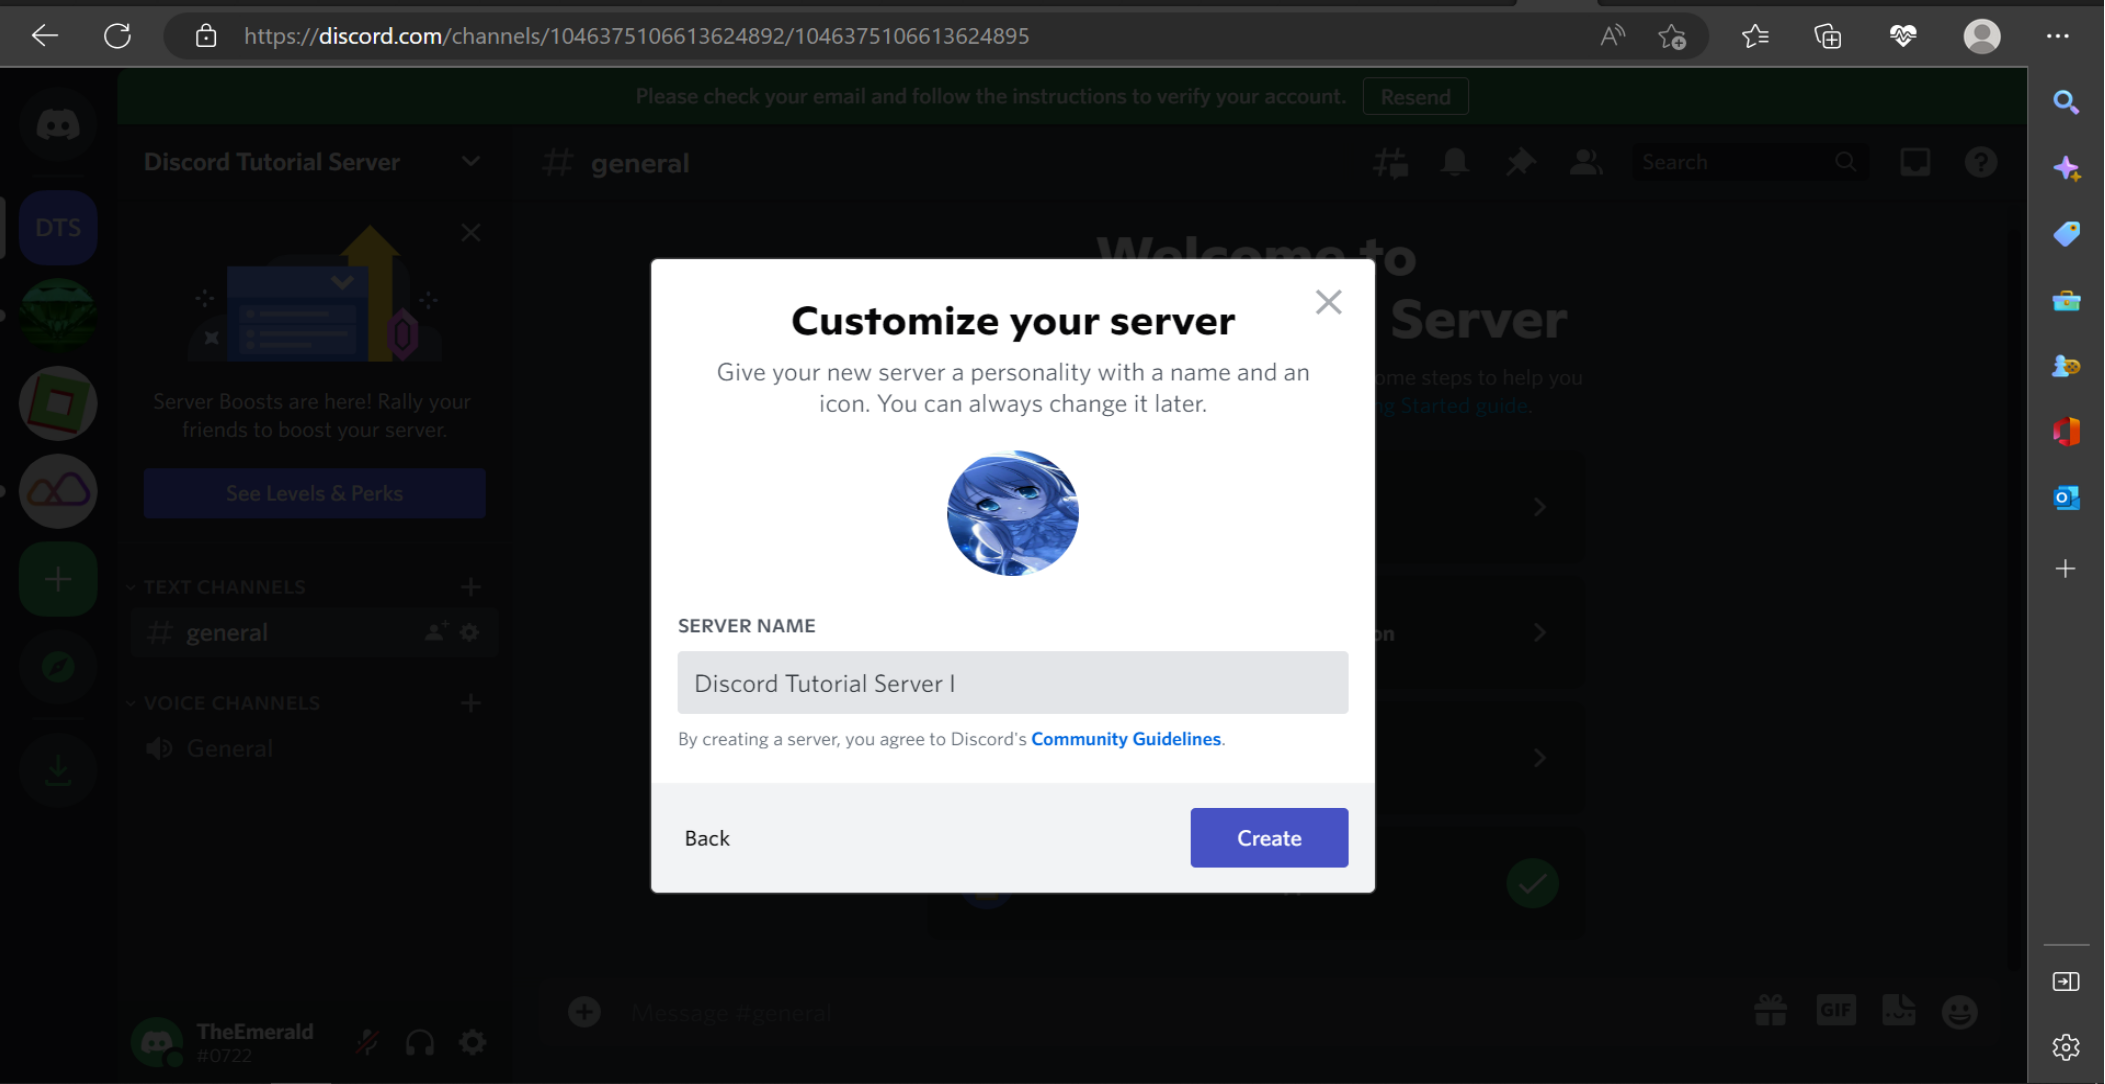
Now, you should see the server displayed on the sidebar on the left side of your screen.
Step 2: Create Your Discord Bot
Now that you have your Discord server ready, move on to create your own Discord bot on the developer portal. The portal is a platform for developers to create apps that can connect to and interact with Discord servers. You can also create a simple app to connect to, interact with, and manage your Discord server.
Follow the steps below to create a bot on the portal.
- To begin, visit the Discord developer portal website on your web browser.
- Click on the New Application button at the screen's top right corner.
- A new window will appear, prompting you to provide a name for the bot you want to create. Input the name into the description box provided.
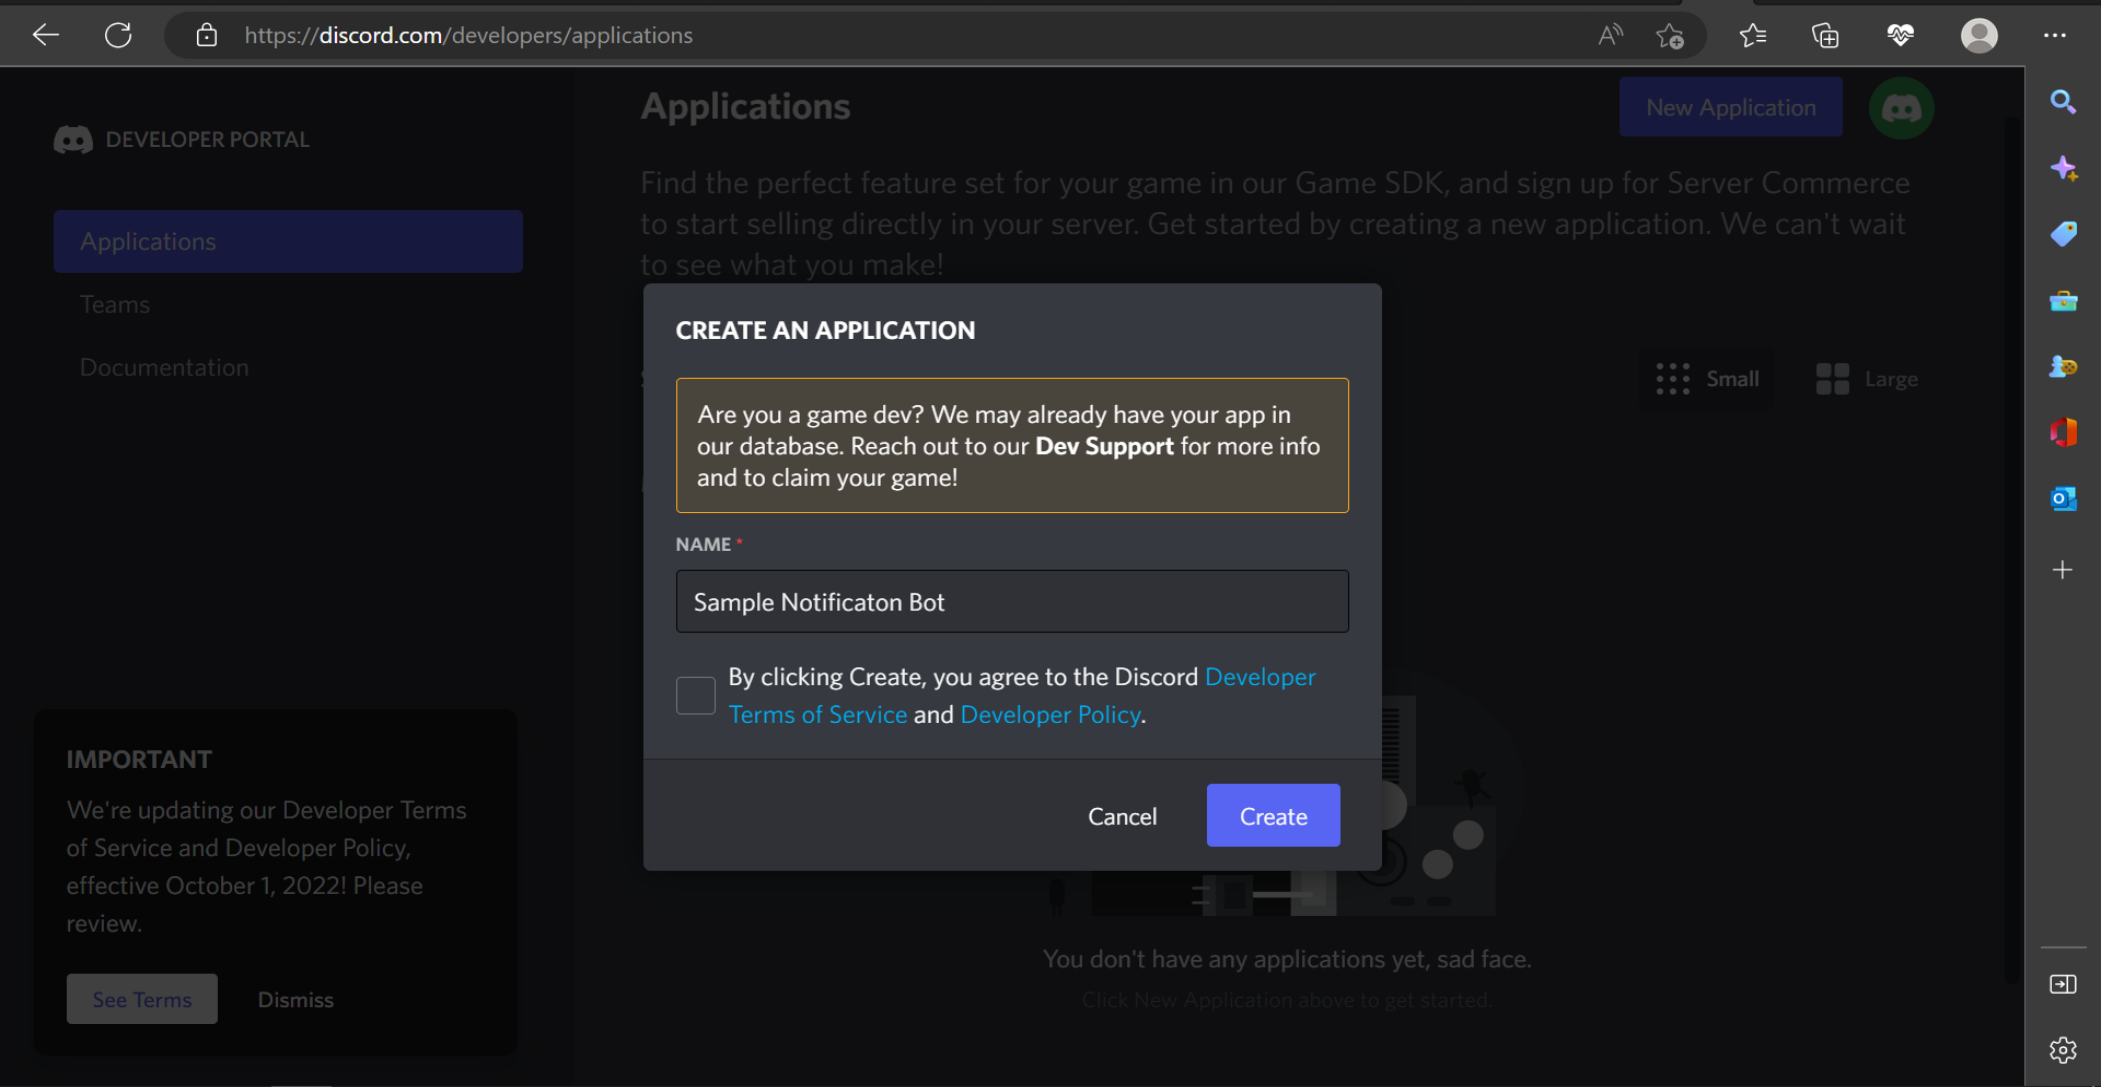
- Check the terms of agreement box to affirm your desire to comply with Discord’s policy. Next, click Create.
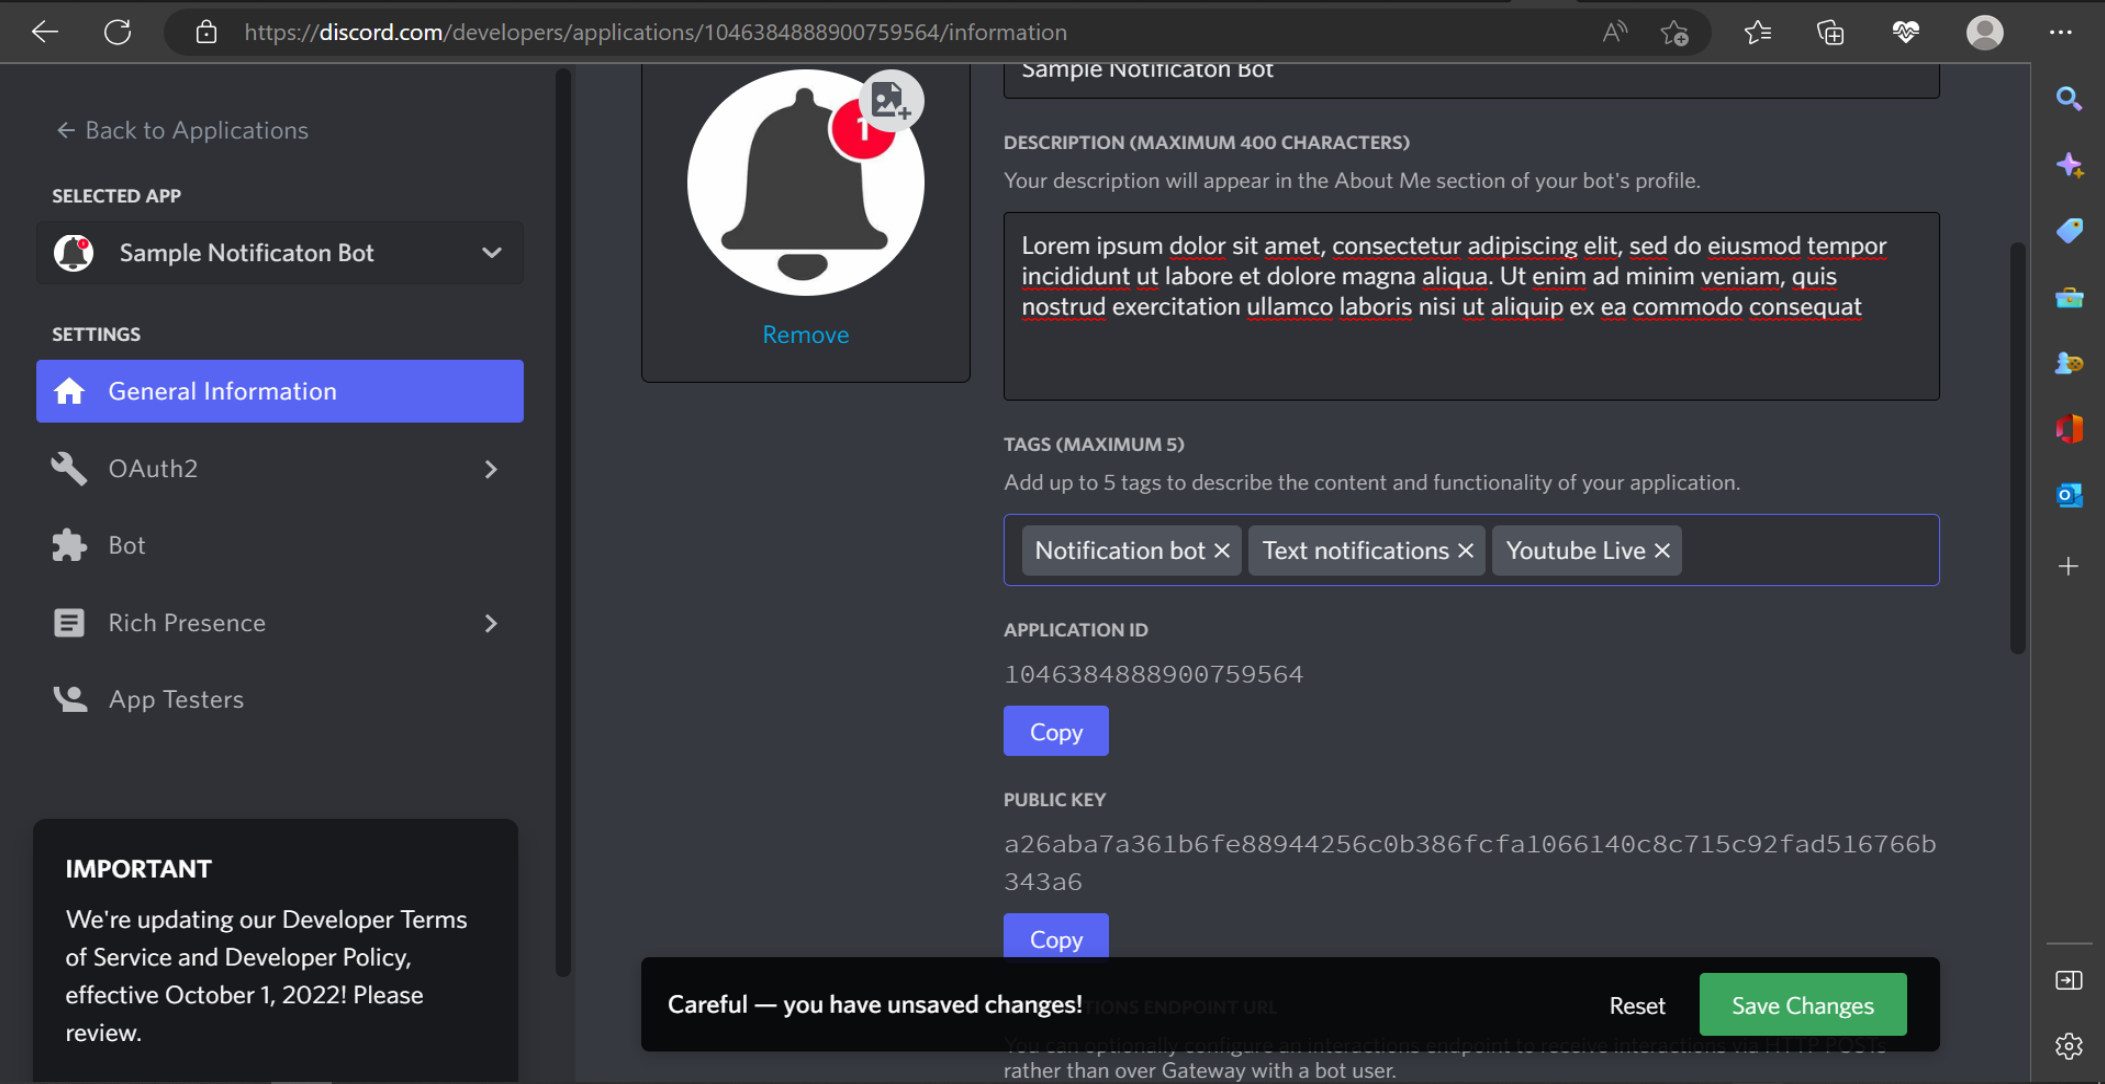
- You should have a new window displaying various information about the bot. You can provide some information about your bot in the description box and include tags that best describe your bot’s functions. Once you complete the edits, click Save Changes.
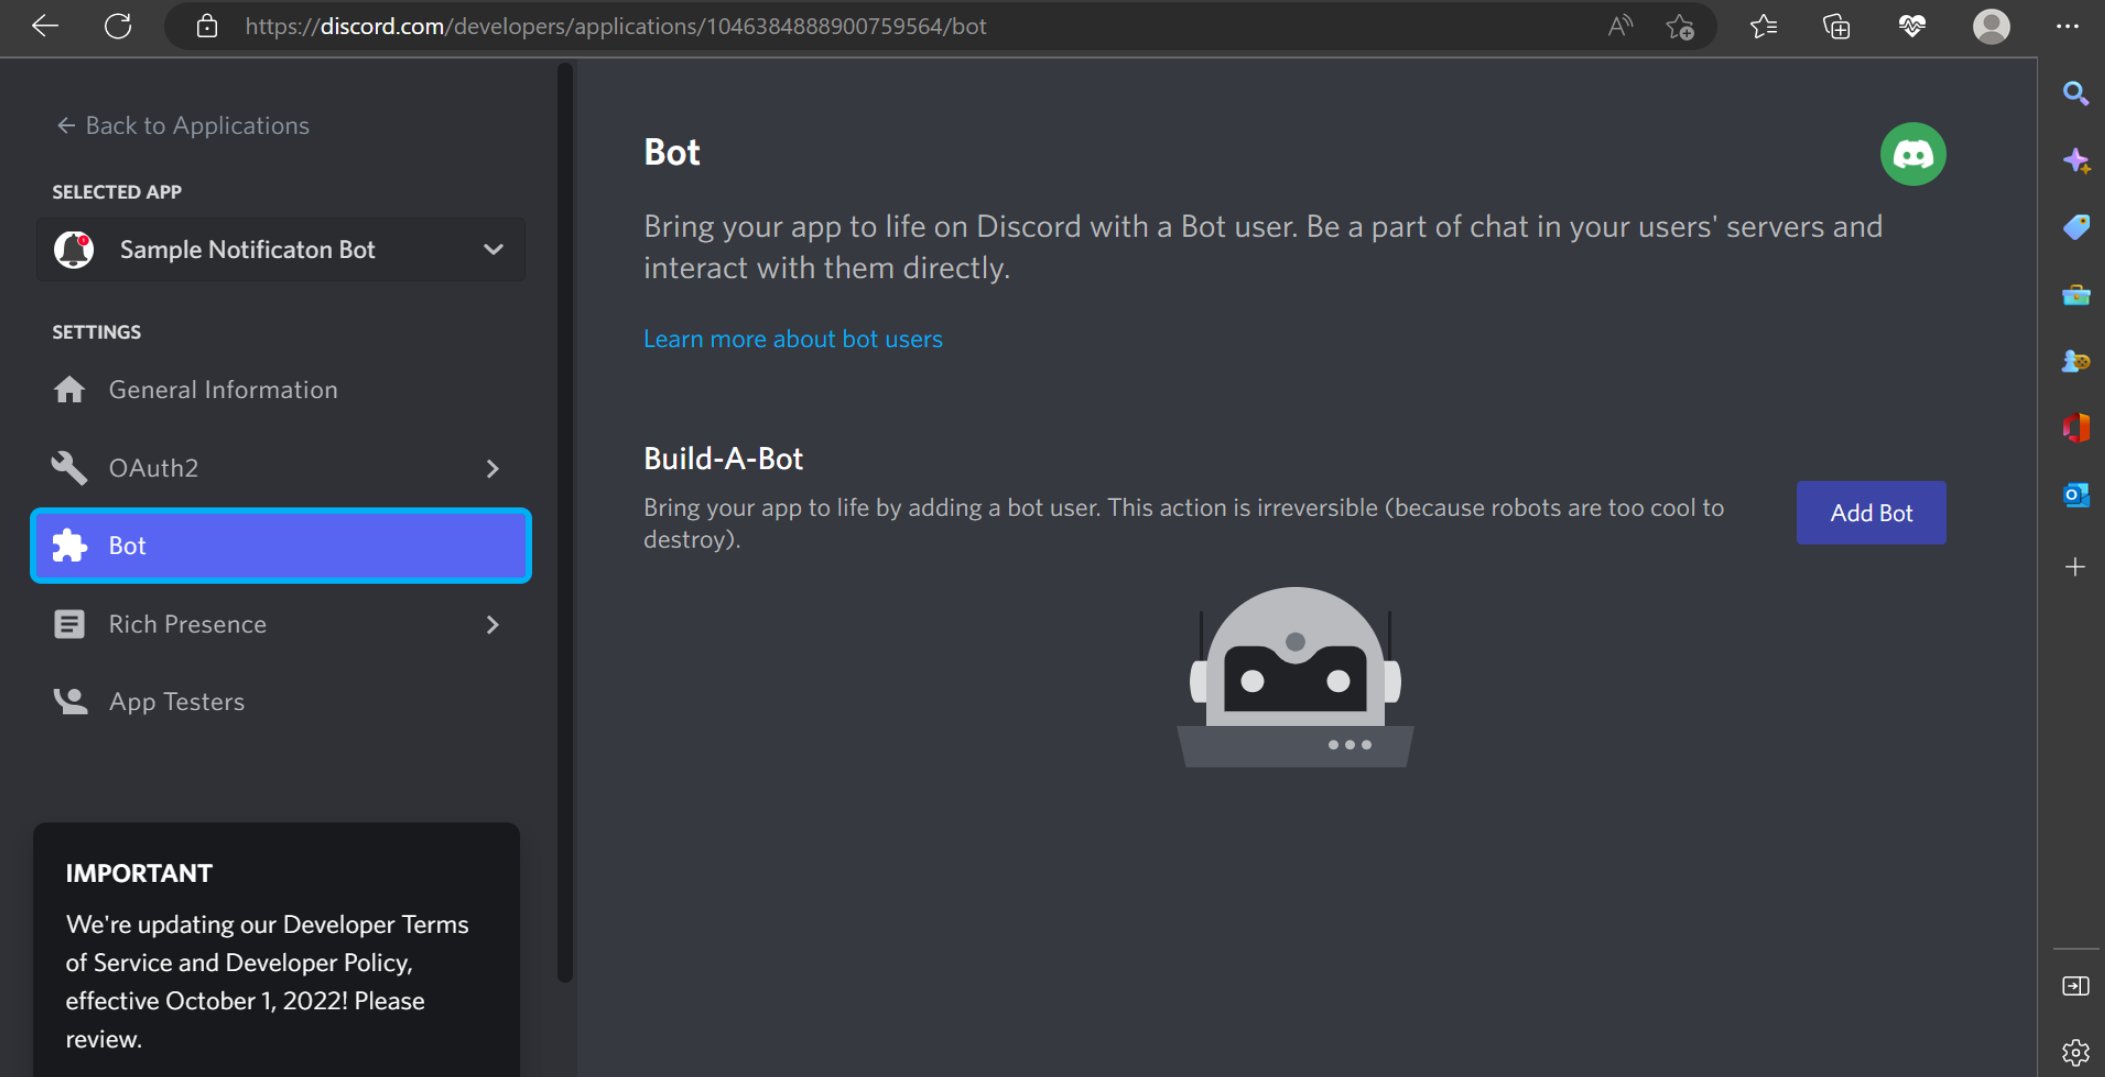
- From the list of tabs on the left sidebar, click on Bot. Next, select Add Bot.
- A mini window will appear, asking you to confirm your decision to create your own Discord bot. Click on “Yes, do it.”
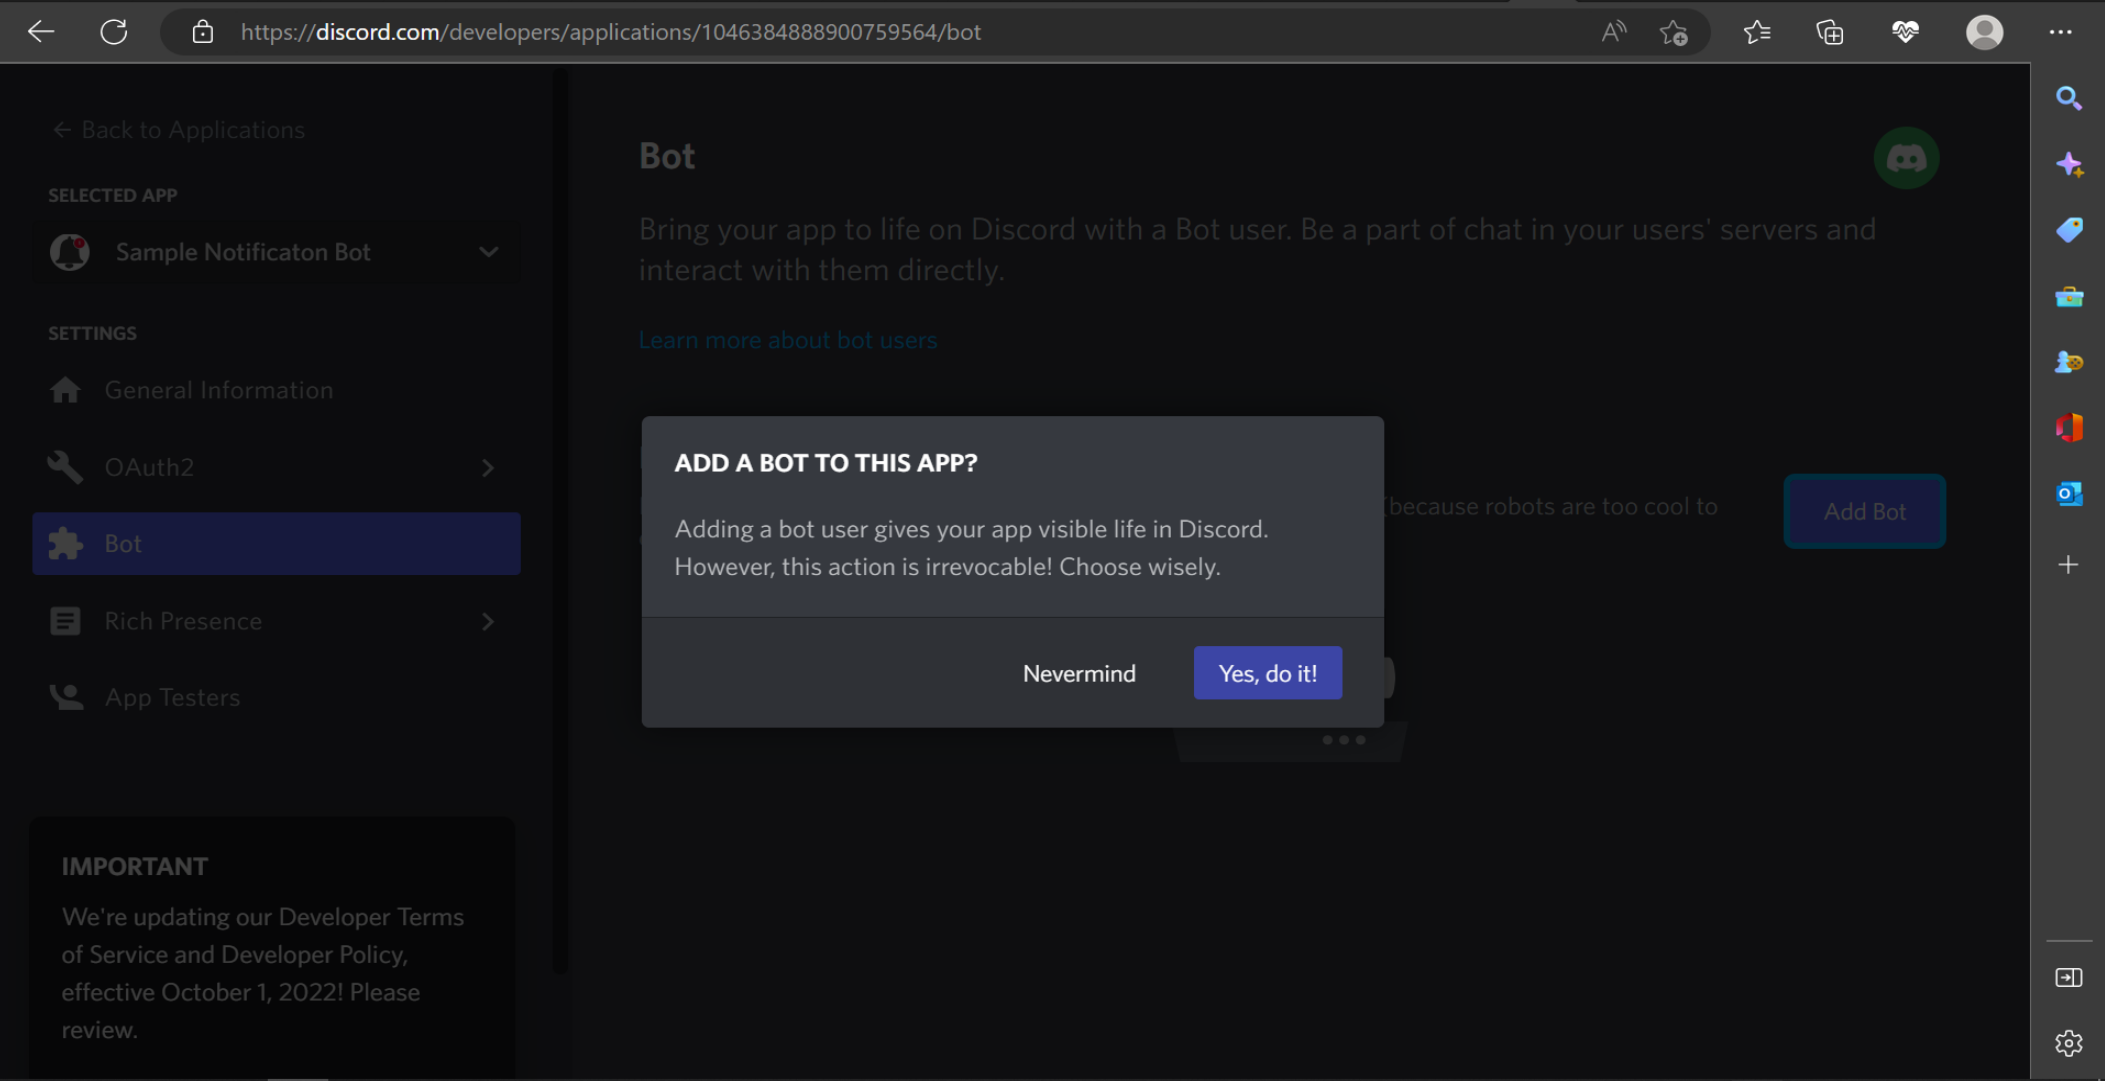
There you have it, your own Discord bot.
Step 3: Copy and Save the Token
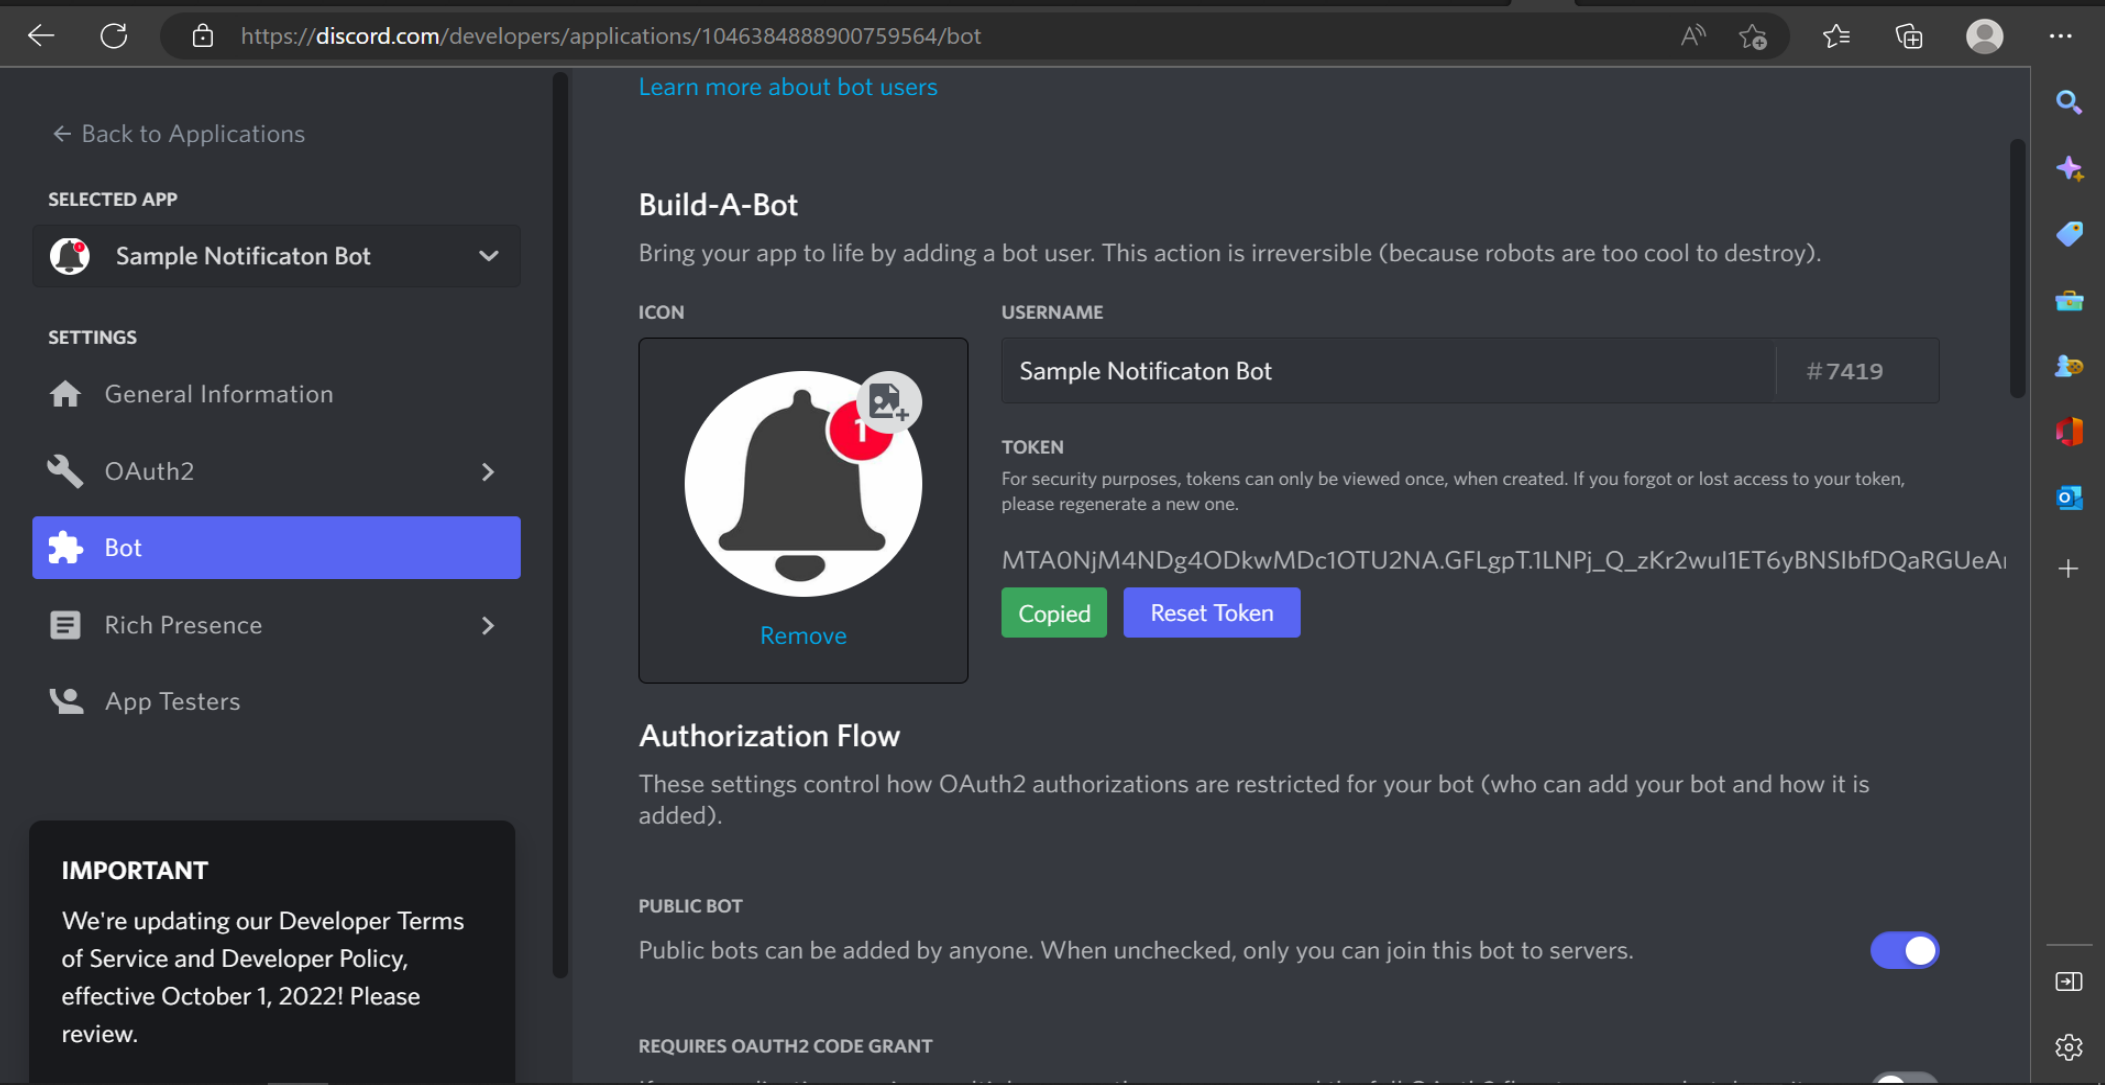
After creating your bot, the first thing to do is to copy the bot's token and save it somewhere safe because you will need it later when setting up. Do not share the token with anyone as they can use it to gain access and manage your bot.
Here’s how to copy and save your bot token.
- Go to the Bot tab on the sidebar of the portal.
- Under the Build a Bot section, click the Copy button next to the bot icon and save in your notepad.
Step 4: Authorize the Bot to a Server
After creating the bot, you have to set up the permissions that define how much control the bot will have on your server.
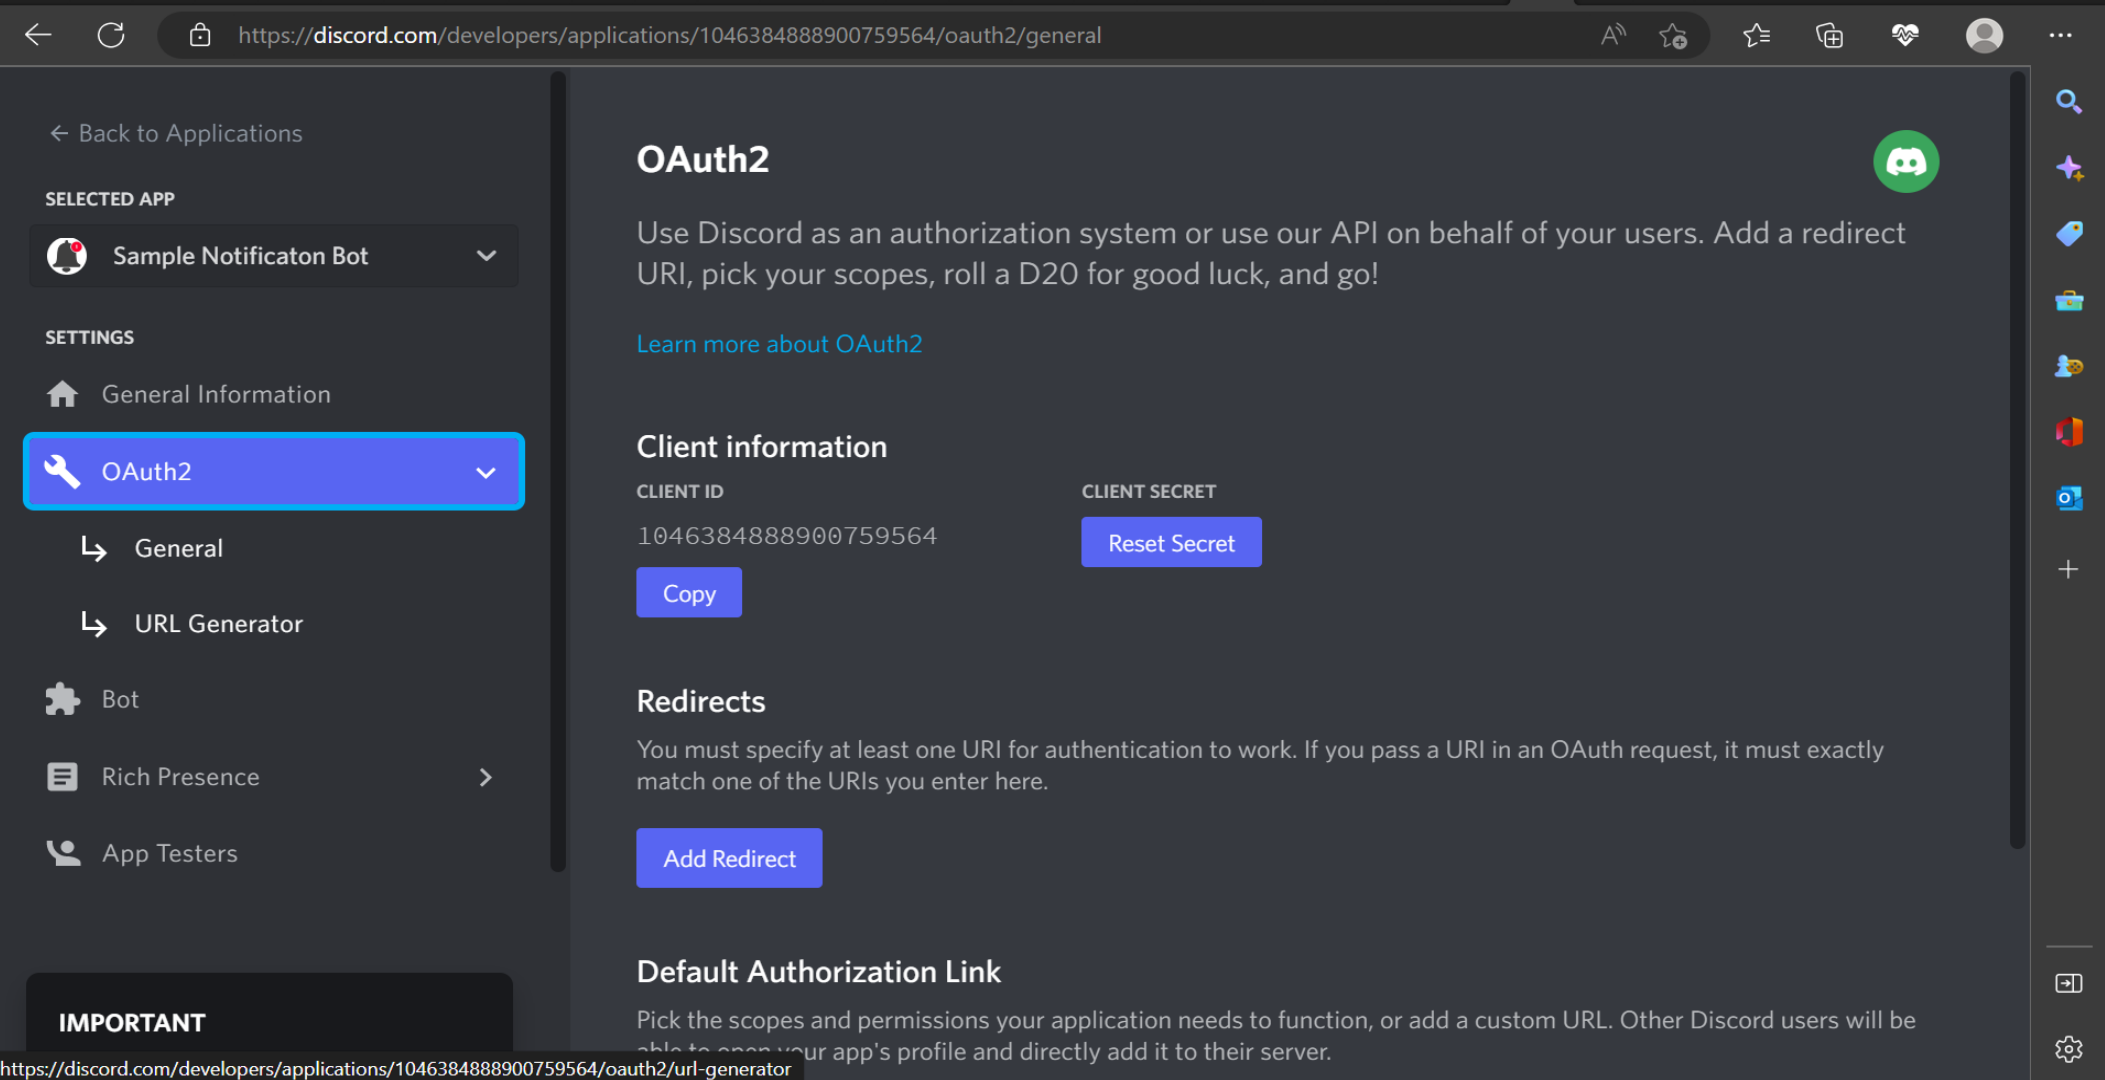
- Still within the portal, click on the OAuth2 on the left bar and select URL Generator.
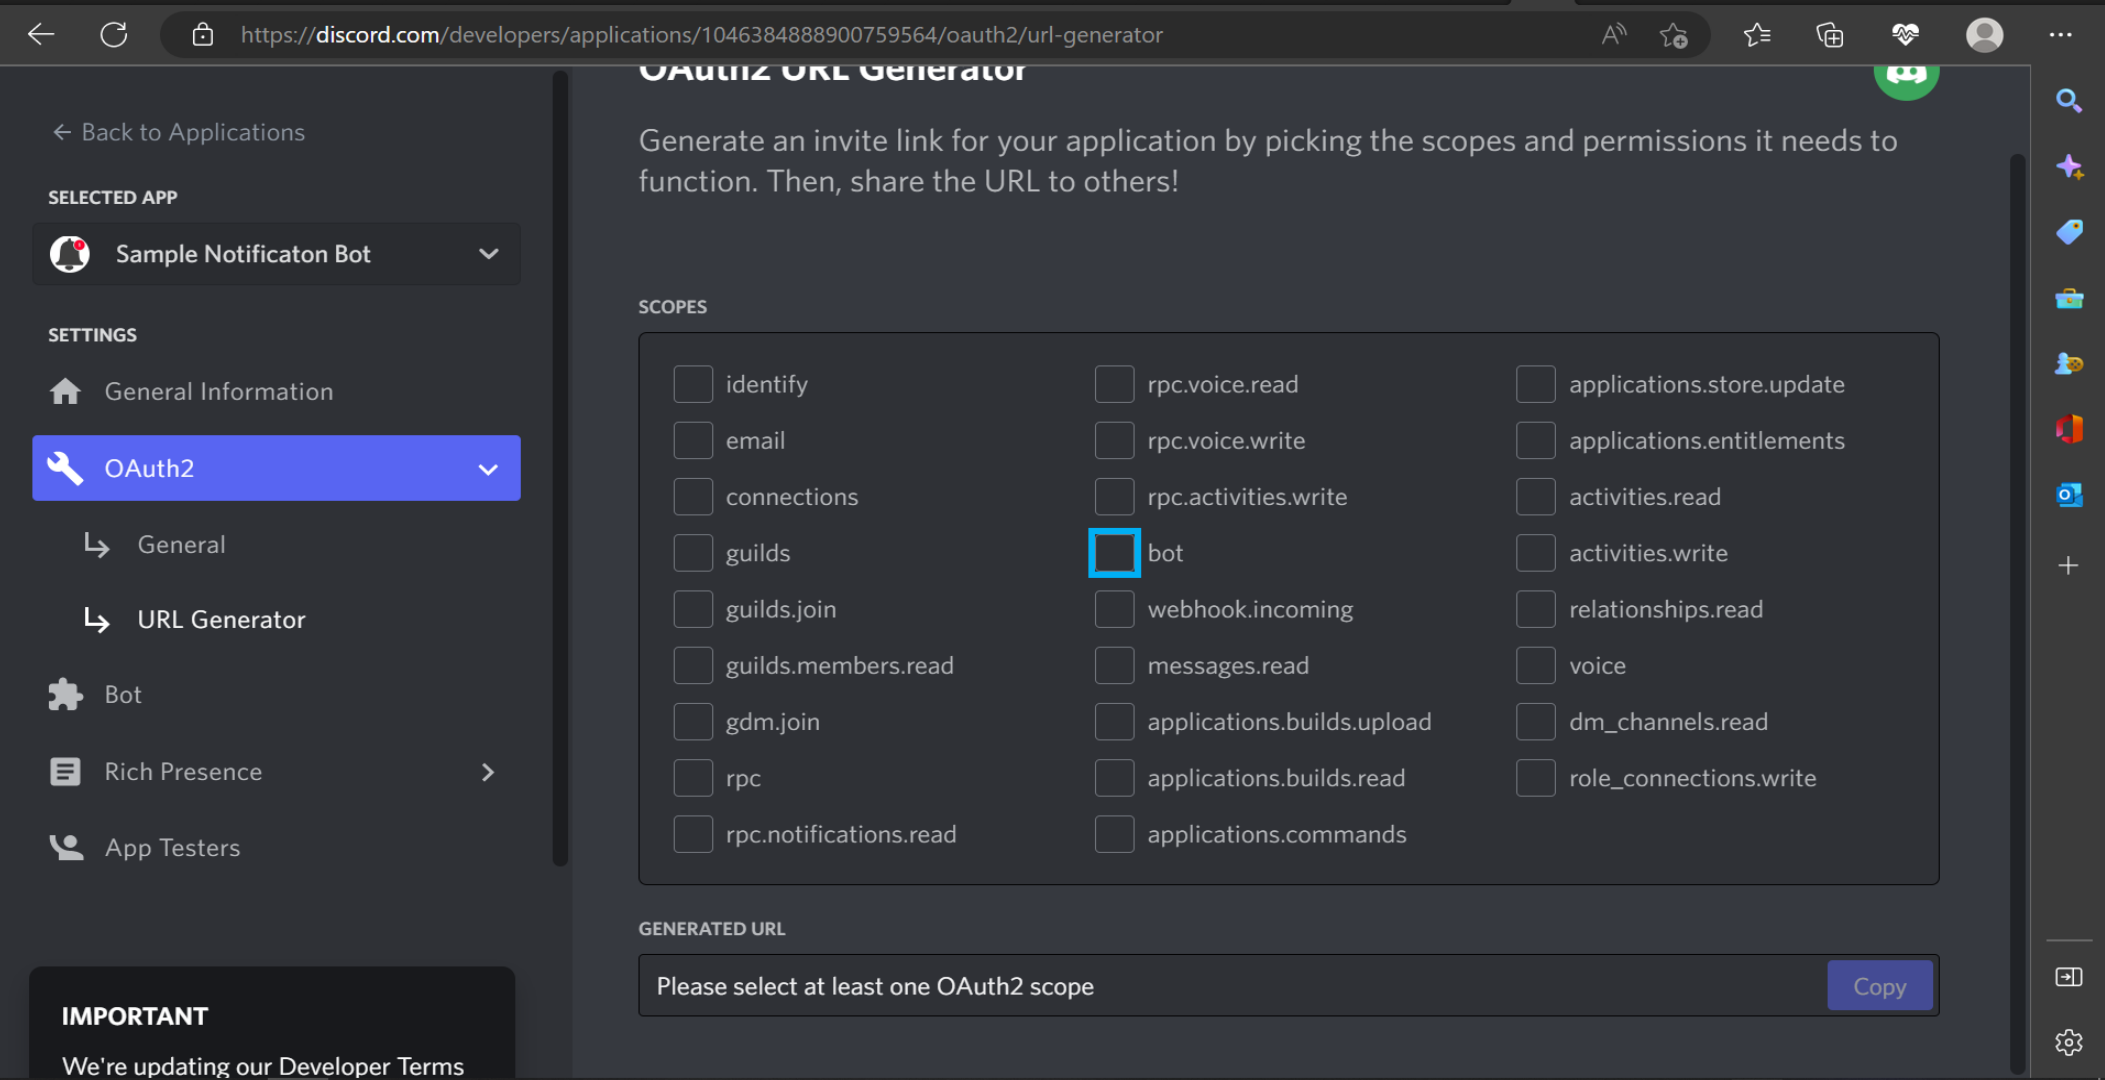
- Under the Scope section, click on Bot. The page will become updated instantly as you click the Bot option and the Permissions section will appear below the Scope section.
-
Scroll down to the Permissions section on the page to select the type list of activities your bot will have the ability to carry out. The features you grant should match the functions you want the bot to serve.
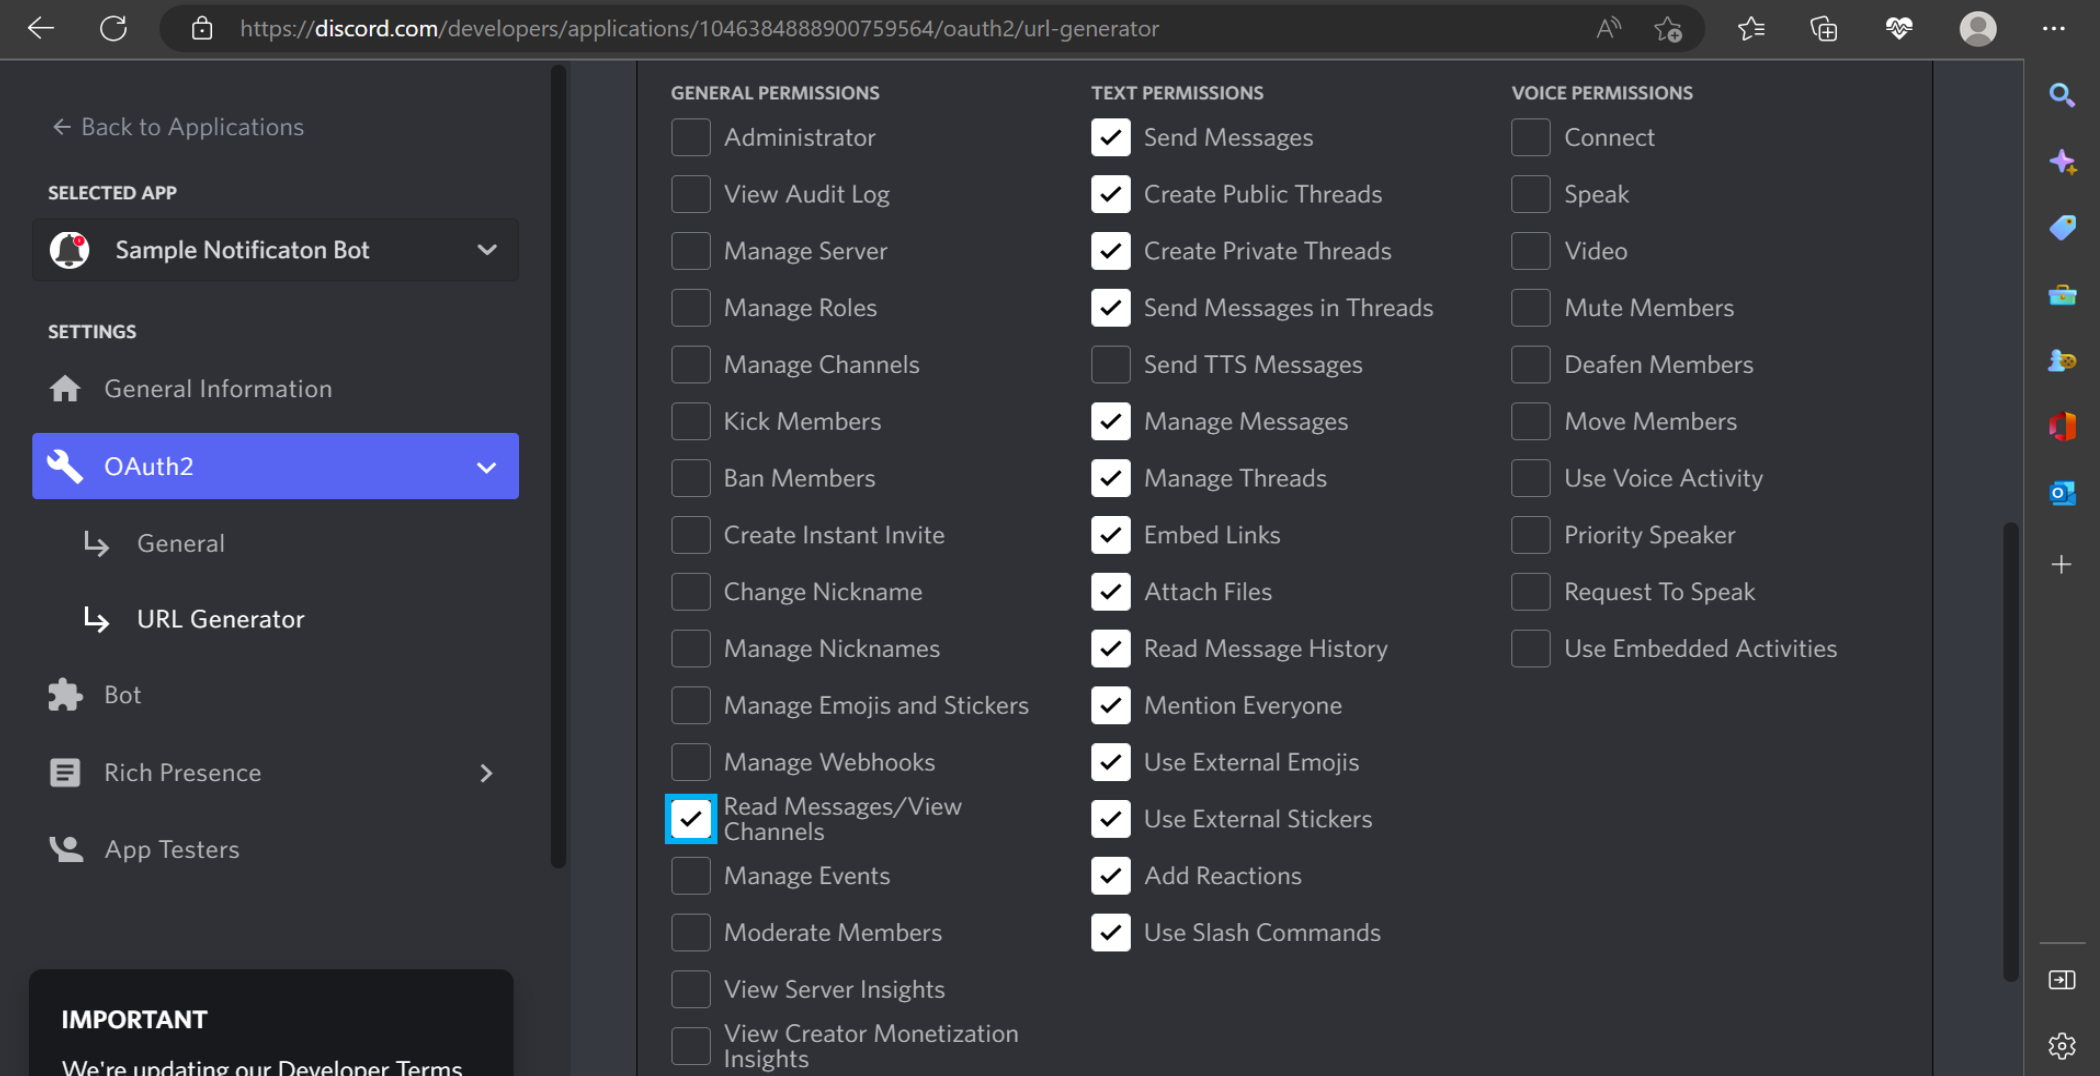
For example, a notification or announcements bot will need to have access to channels and messages to send out messages to your server users. Granting administrator permissions or access to ban your server users may not be necessary in this case.
- After selecting the permissions you wish for the bot, scroll to the bottom of the page to copy the link under the Generate URL section.
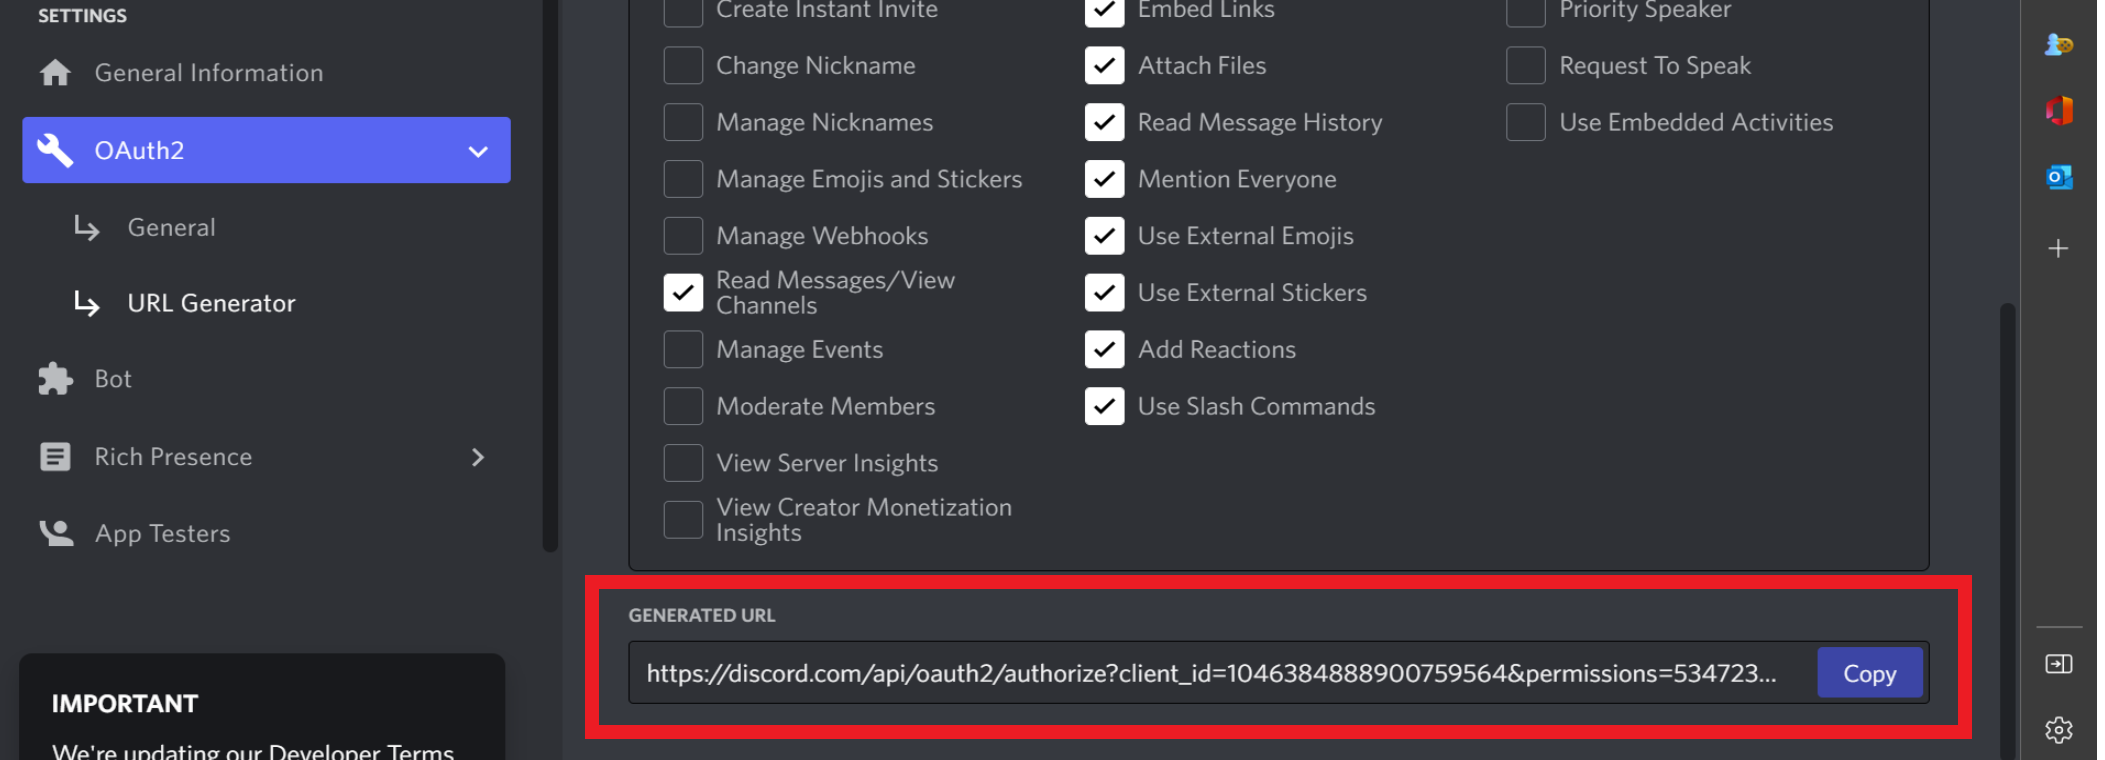
-
Open a new tab on your browser, paste the address you copied in the step above, and press the enter button on your keyboard to connect the bot to your Discord server.
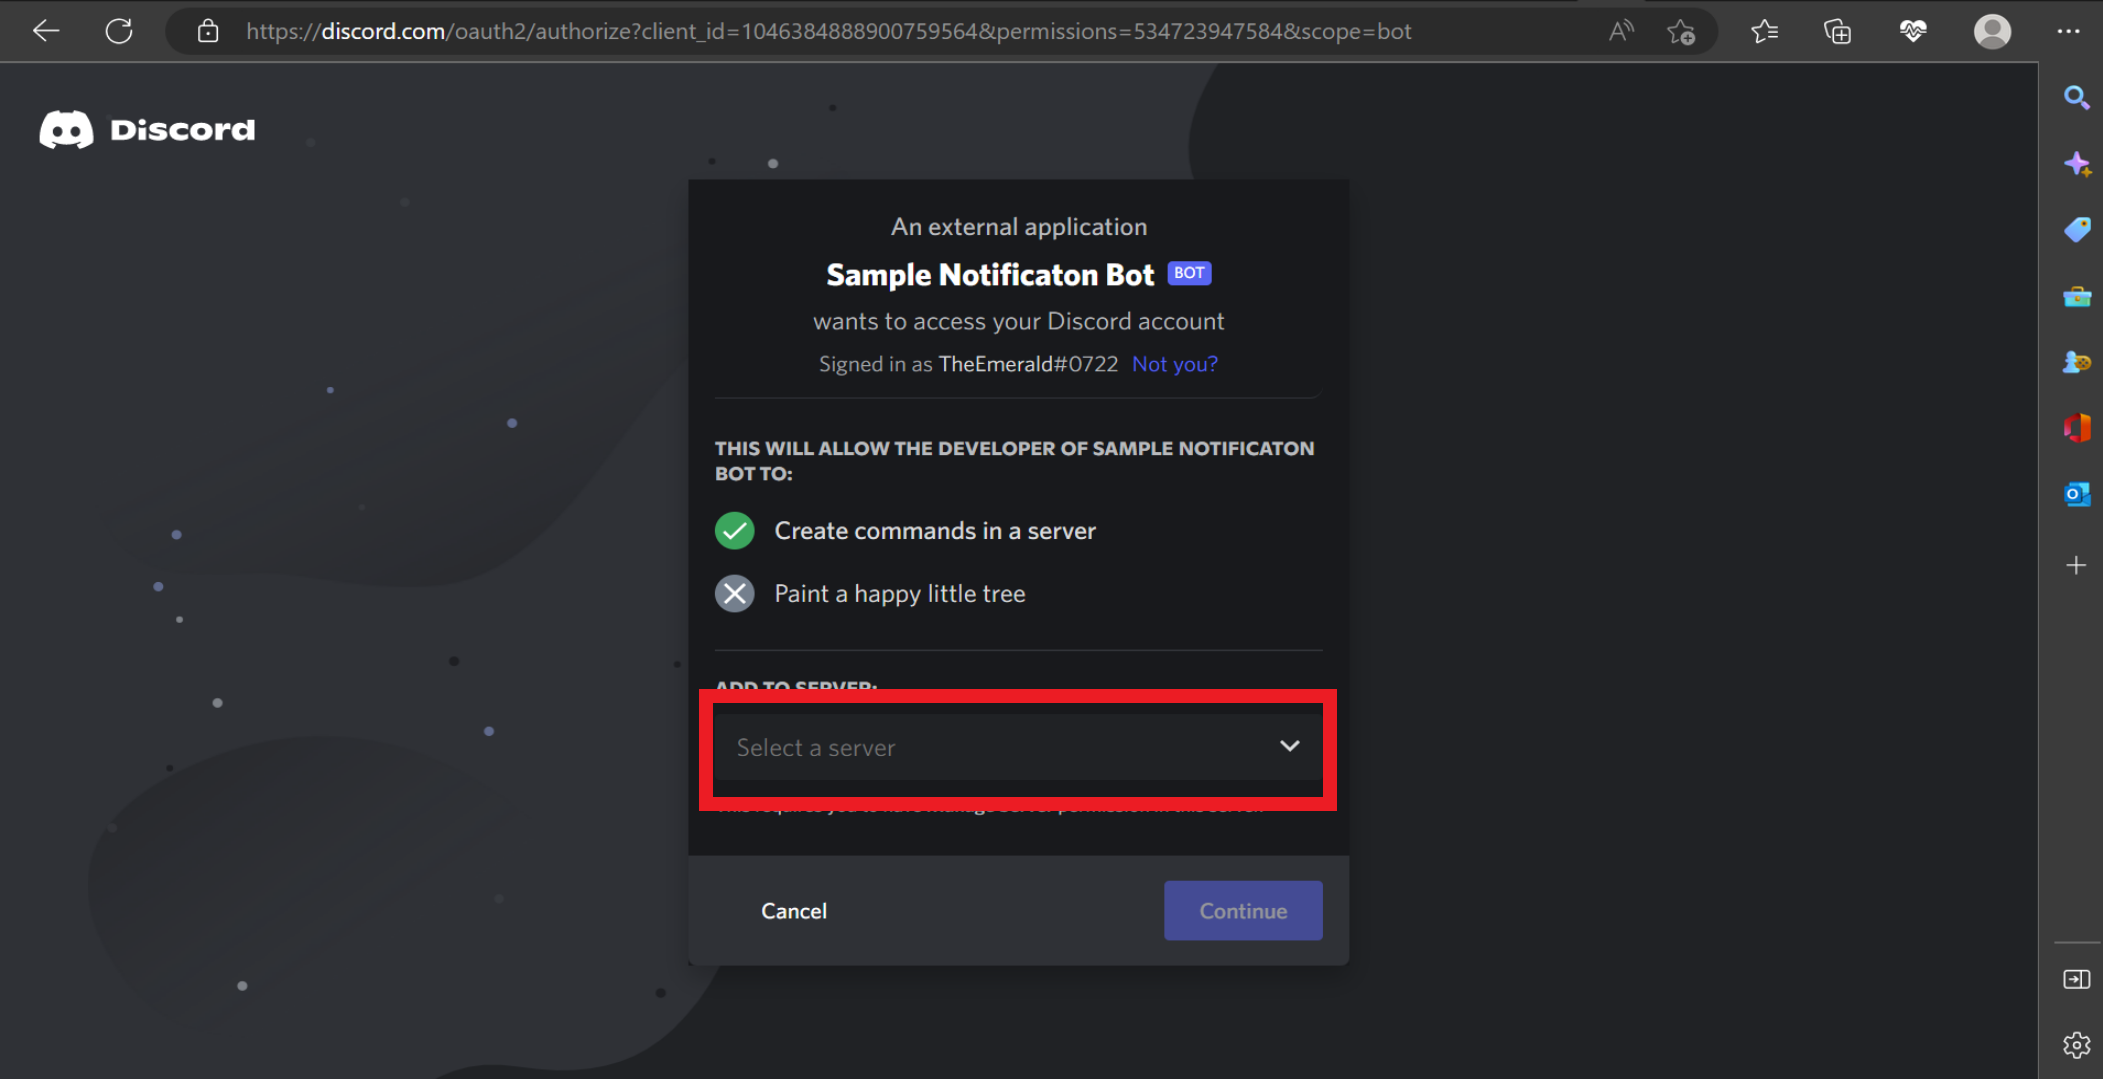
- Click on the down arrow button under the Add to Server section to select the server that will be hosting the bot. Next, click Continue to proceed with the authorization.
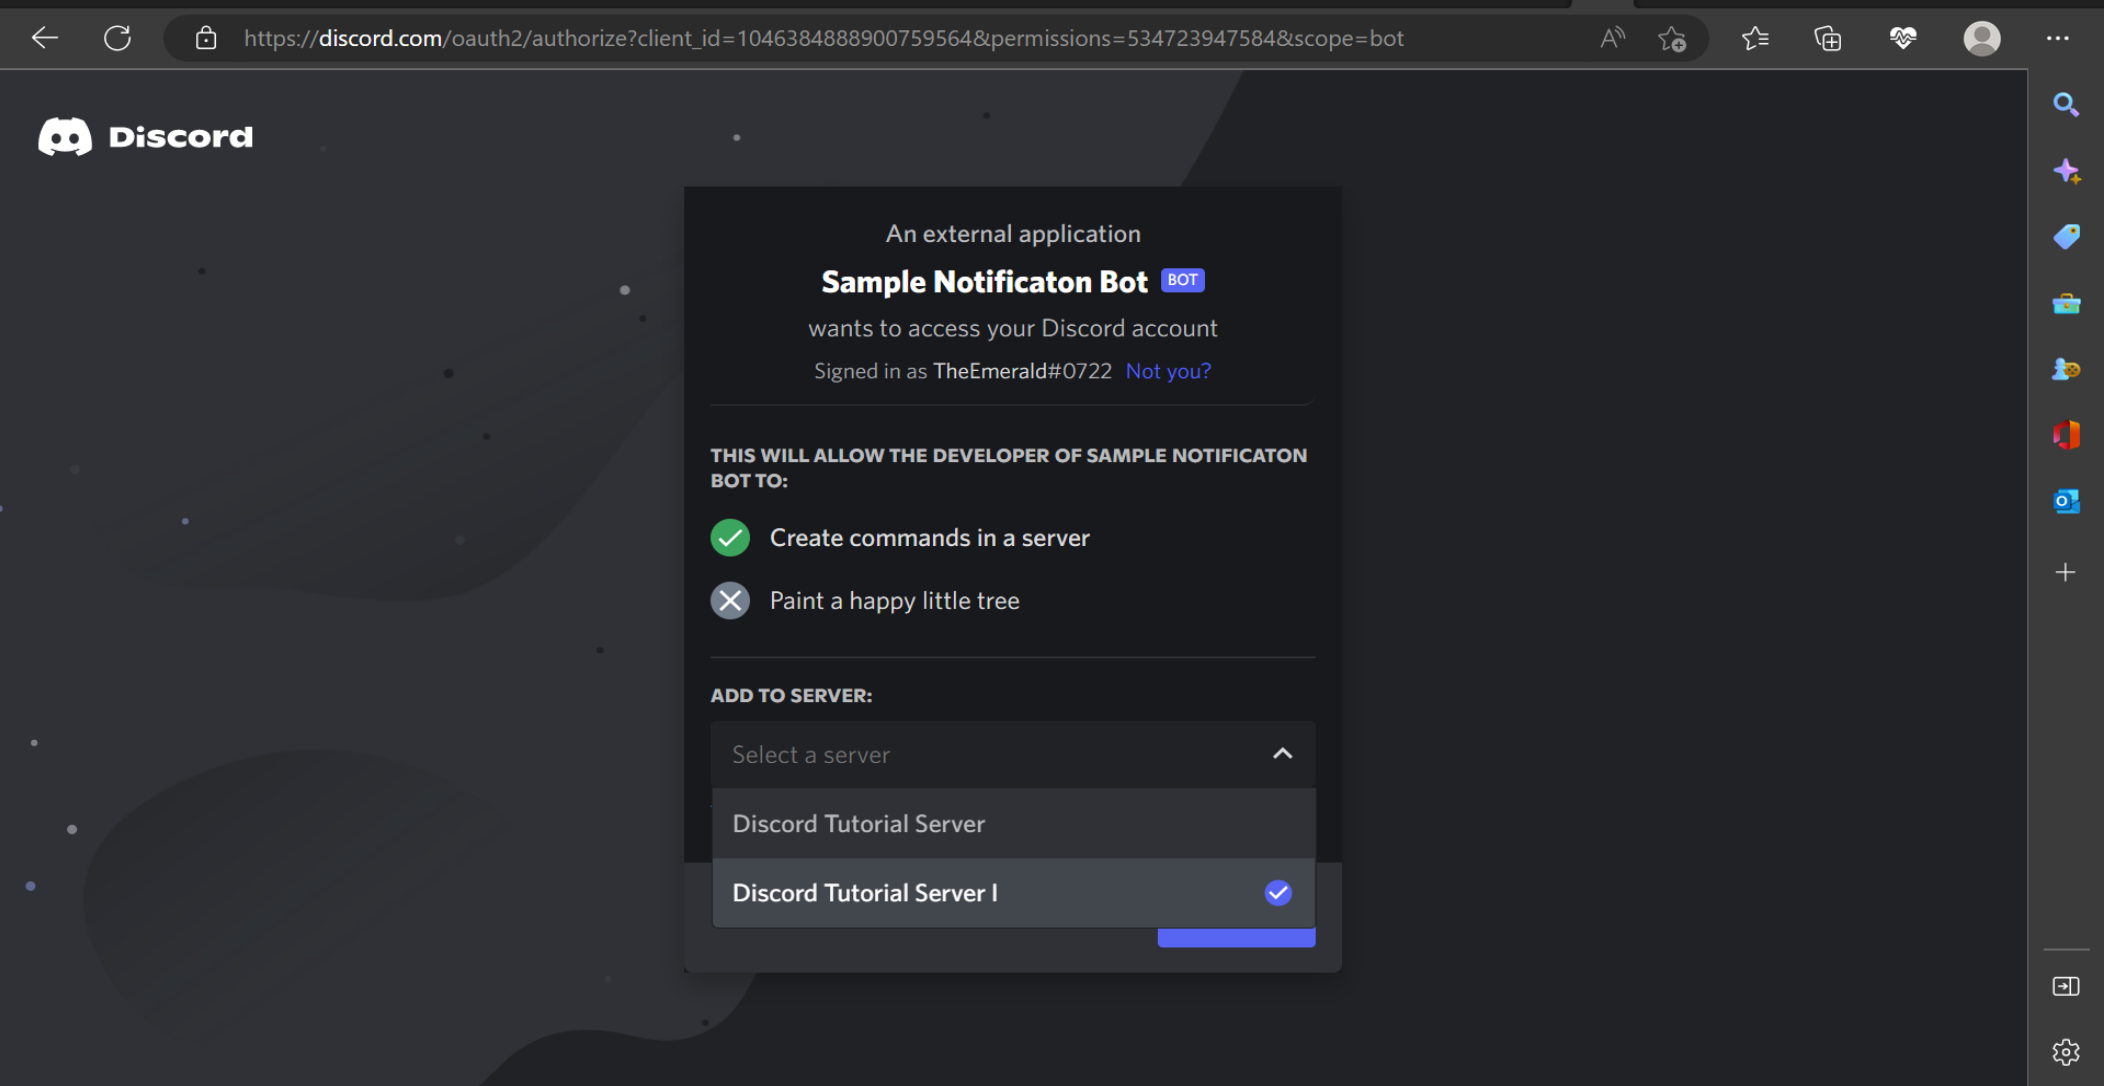
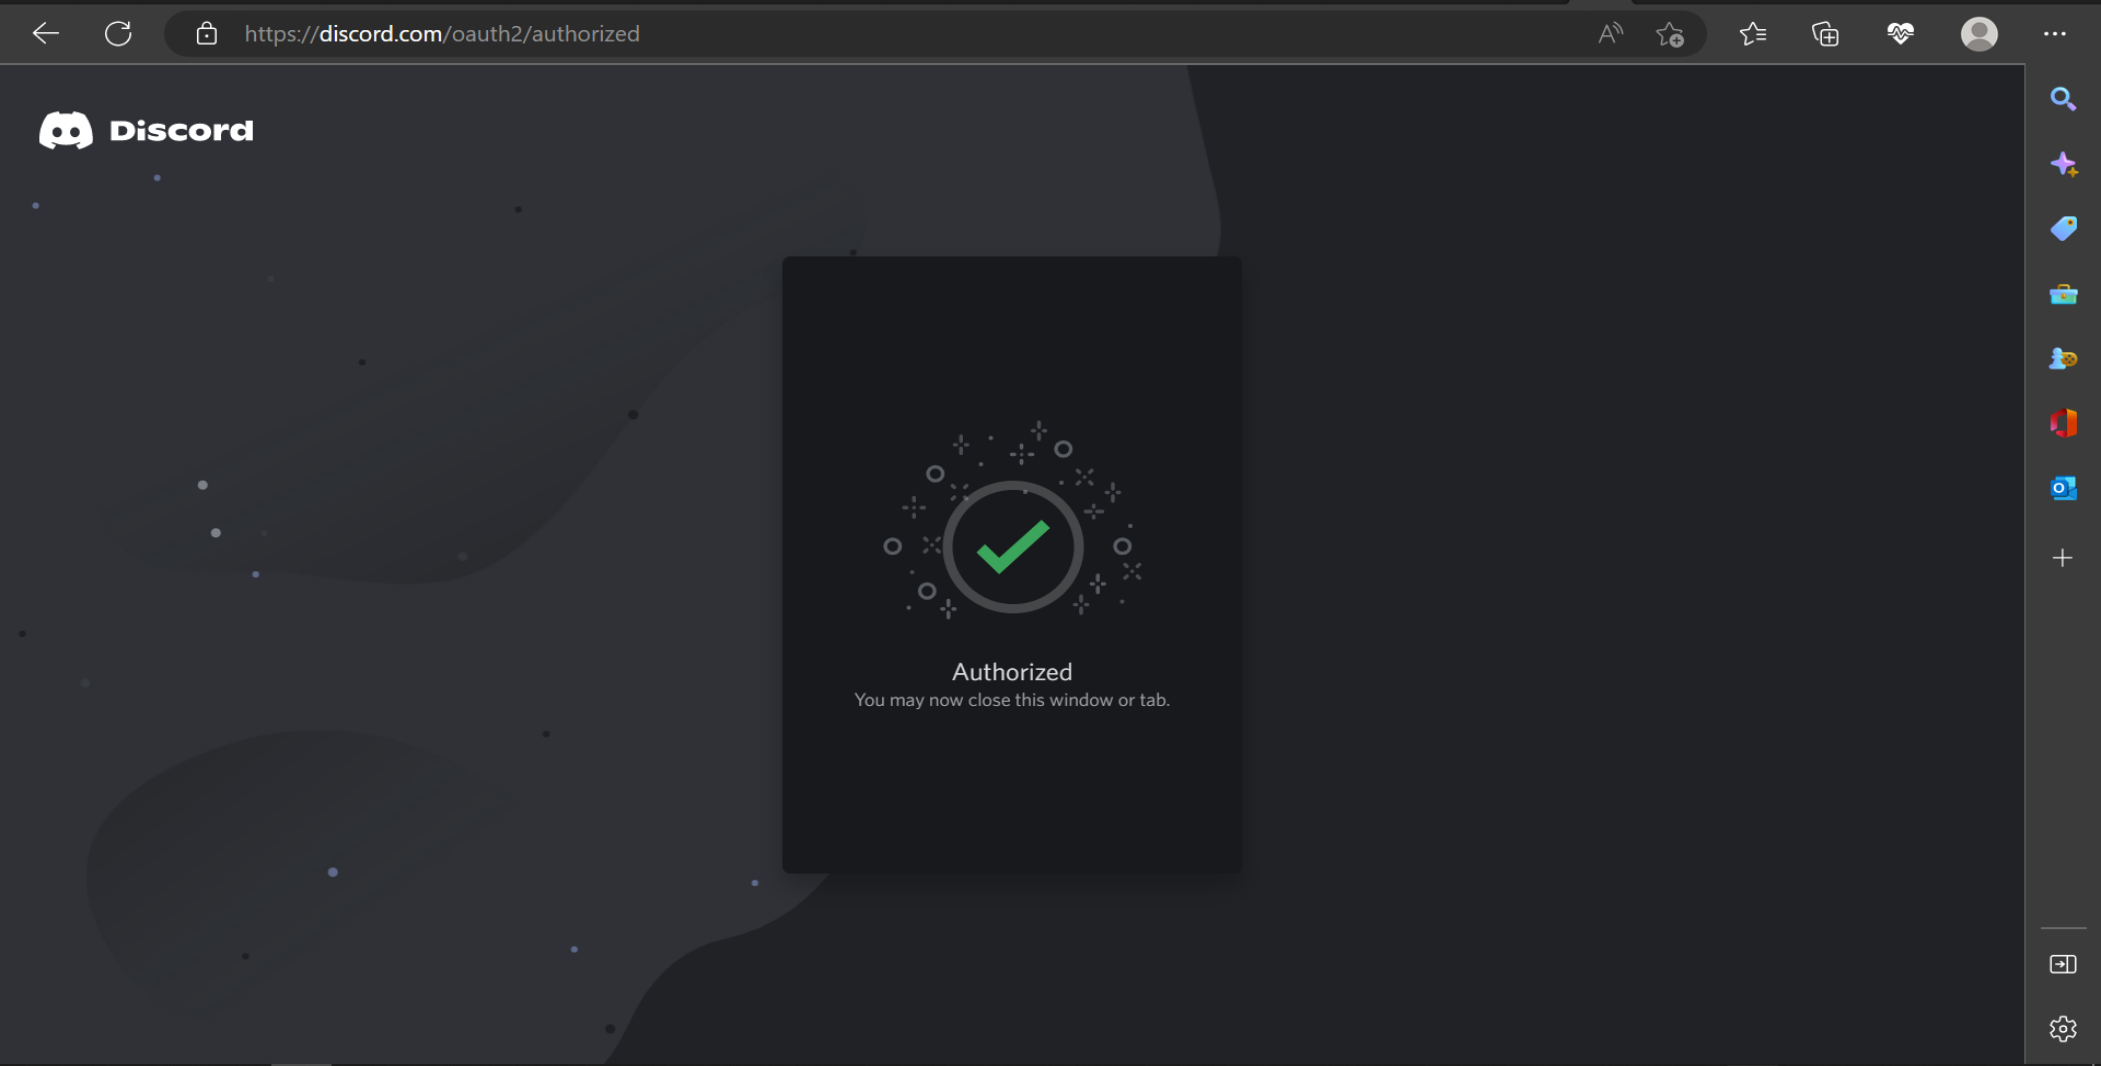
- Now, you should have a new window asking you to confirm the list of all permissions and features you granted the bot. Click Authorize to finalize the authorization process and link your Discord server to your bot. Once it completes linking, you should get have a window as seen in the image below:
Step 5: Program the Bot
Up to this point, you created a bot, defined its unique feature, and linked it to your Discord server. For the bot to become fully functional, you must write the Python script to run the bot.
Typically, you will need some coding background or a bot designer to complete this step. However, the following steps will show you how to program your bot with or without coding experience.
-
Install Python Package
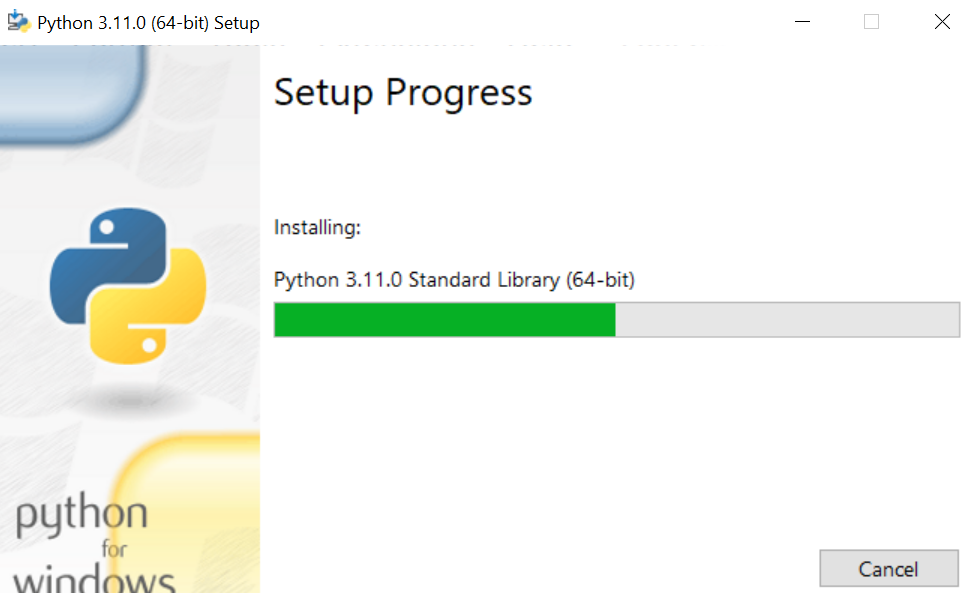
Download the Python package version 3.5.3 or later from the official website. Having a later version may be a preferable option as each new update version improves features or fixes bugs present in older versions. After downloading, open the file to begin the installation. Select a path on your device to save the Python package with your local files and click finish once the installation is done.
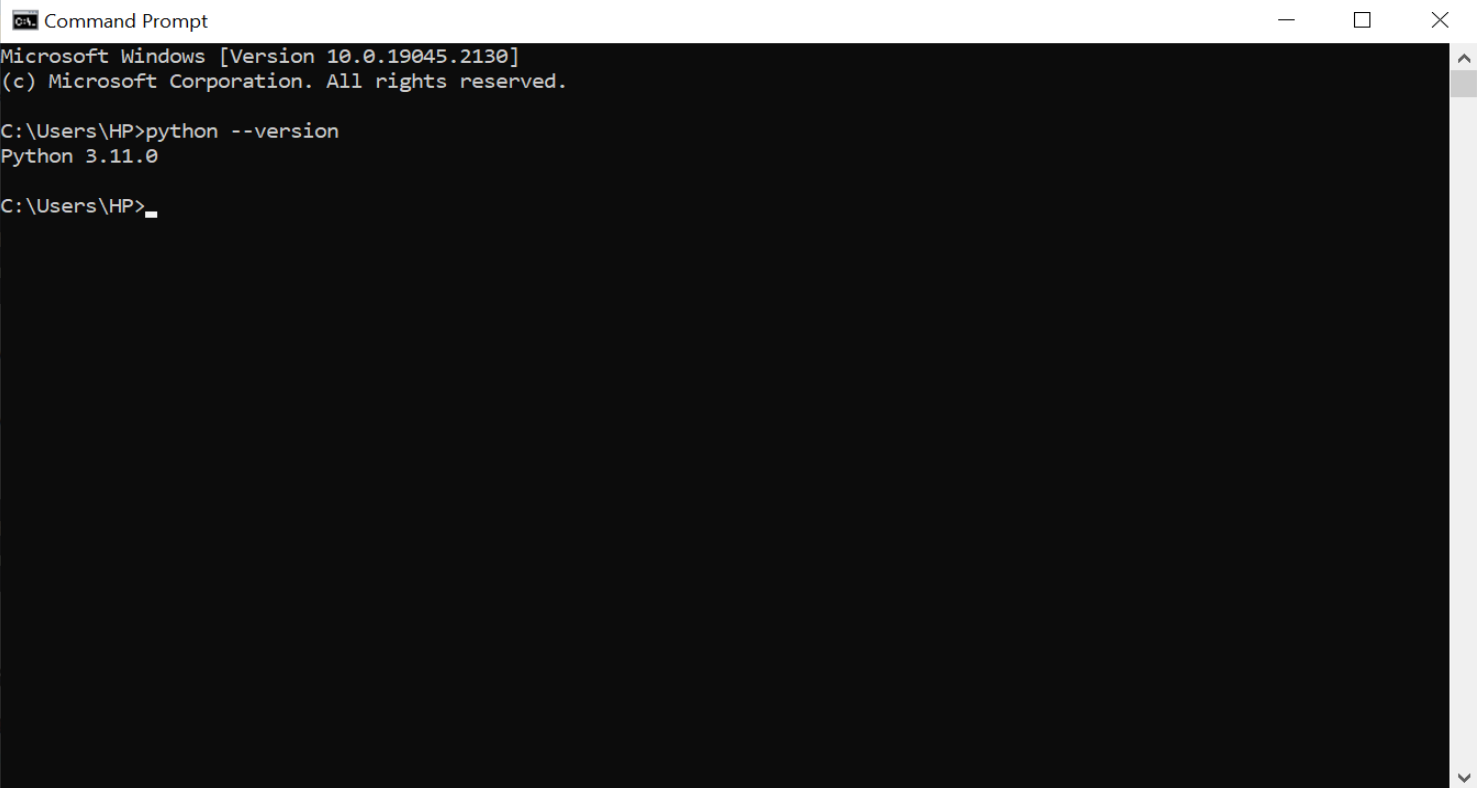
If you already have Python, run the following commands on your command prompt app to verify the version: python --version
-
Program Your Discord Bots Using Python Programming Language
To begin programming your bot, open the Python app or any other programming editor app like Visual Studio Code. Enter the following commands as shown in the image below. In the Token command line, use the code you copied earlier during the setup process.
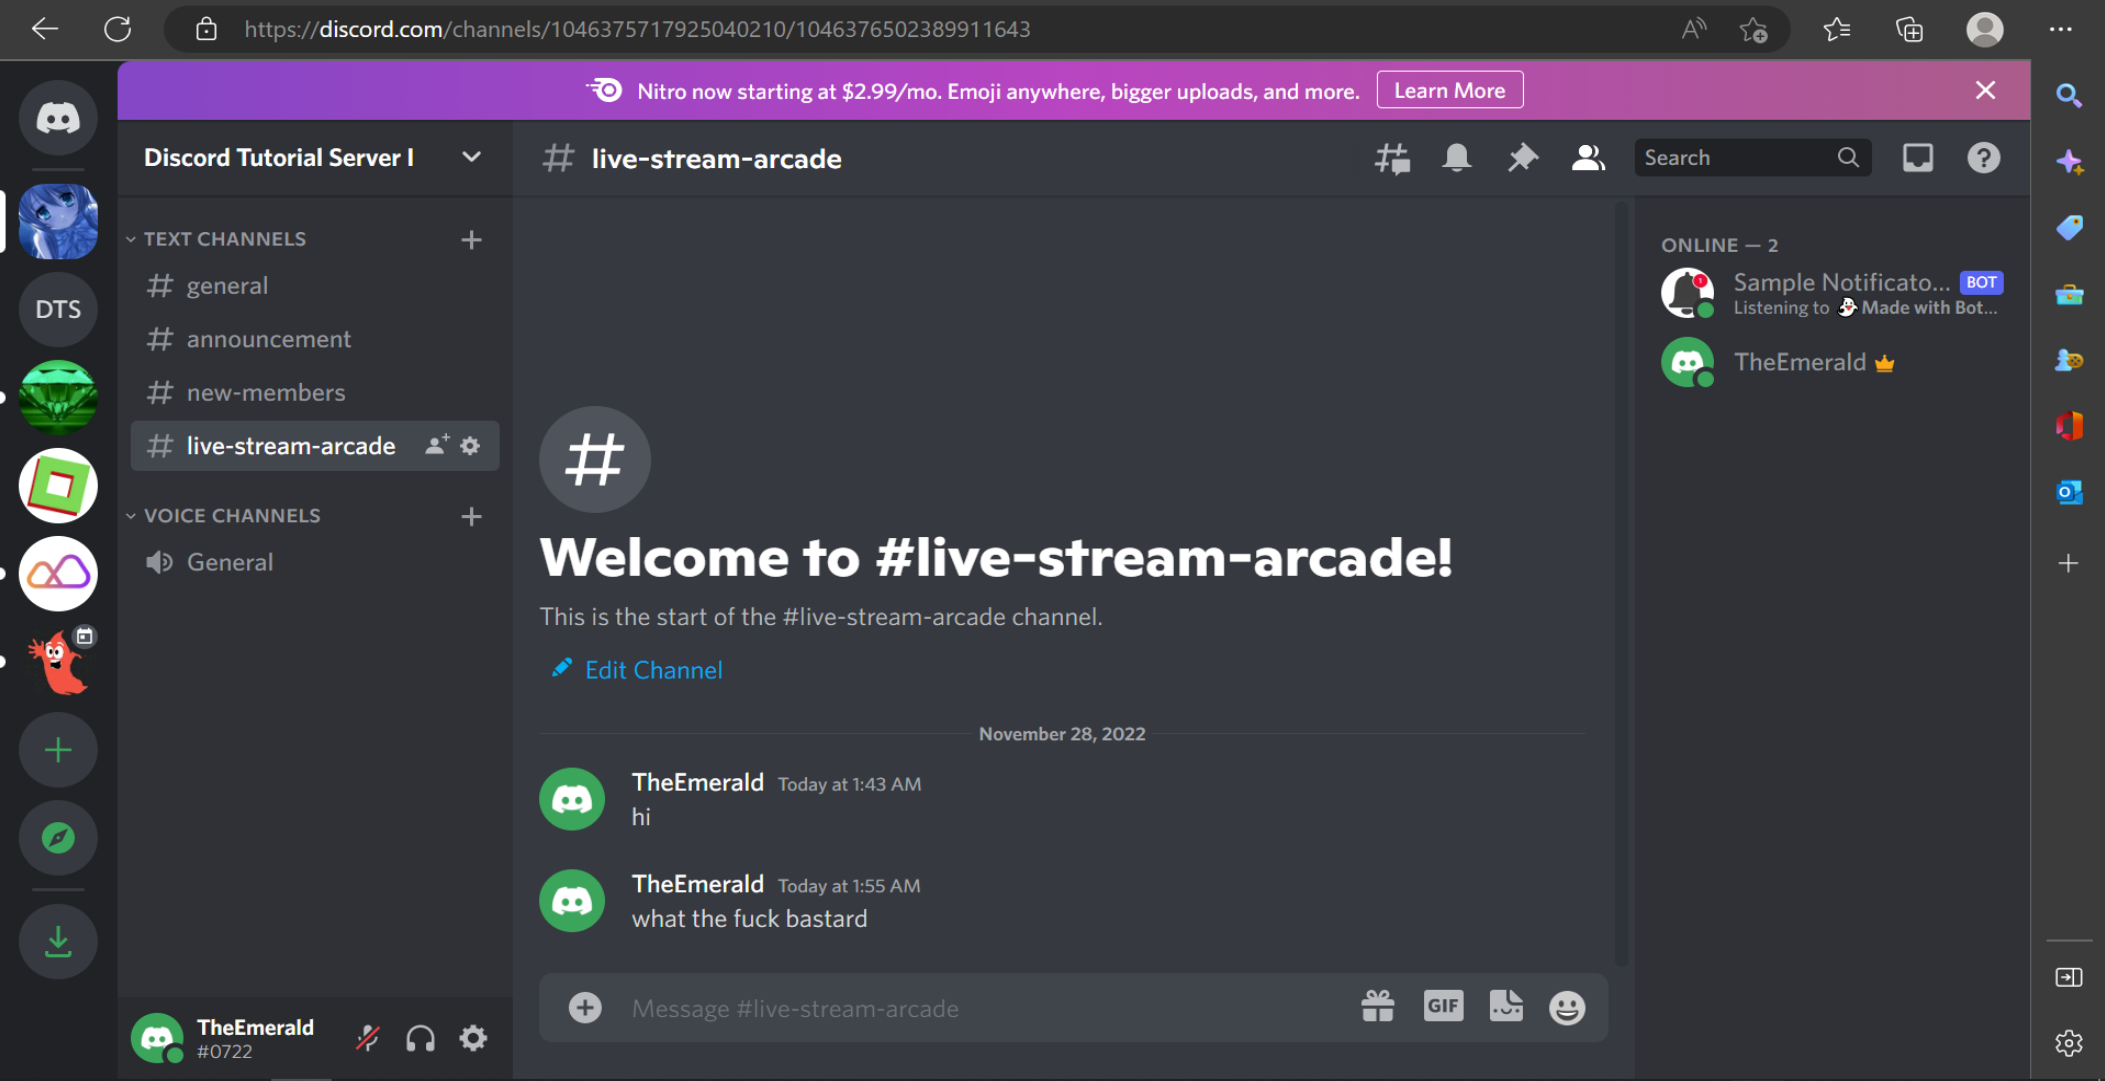
Run the commands and reload your Discord app. Check the status bar at the right side of the screen, and you will notice your Bot is now online. You can further update and add more functionalities by including several other commands to the Python script.
No Coding Experience? Use A Discord Bot Maker
Having Discord bots for several functions can help you automate your workflow and better manage your server. The challenge people may face with getting bots is their limited coding knowledge. If you are now in such a situation, you can use a Discord bot maker to create the programming scripting with no coding required.
Some of these frameworks, like BotGhost or Bot for Discord, also features like provide added integrated bug reporting features and command generation to help you control the bots with no coding required. Further, these platforms help you manage gateway intents for your selected guilds or servers since you can decide which events will trigger responses from your bots.
In addition, these platforms can provide added automatic sync with your social channels like YouTube and Twitch. So, whether you want to make announcements about your next YouTube live stream or welcome new members on your servers, having a Discord bot, having bot gives you may be what you need.